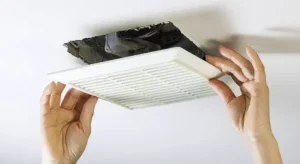
- Safety First: Turn off the power to the fan at the electrical box before starting the cleaning process. Test the fan after cleaning to ensure it doesn’t turn on unintentionally.
- Adequate Lighting: Ensure proper visibility by utilizing natural light if your bathroom has a window. If not, use a torch or battery-operated lighting device.
- Access the Fan: Use a stepladder or sturdy ladder to reach the fan. Newer models usually have tension clips that can be pressed to release the cover, while older models may require a screwdriver.
- Clean the Cover: Remove the cover and clean it using a dry cloth or vacuum to eliminate dirt and dust. Soak the cover in hot water with dish soap for a thorough cleaning.
- Vacuum the Interior: Ascend the ladder again and use a vacuum attachment or compressed air to remove accumulated dirt and dust from inside the fan, including the blades. For stubborn spots, use a soft cloth.
- Inspect and Wipe: Examine the fan cover for any persistent dirt. Use a soft cloth, applying gentle pressure if needed, to remove stubborn grime. Rinse the cover and let it air dry completely.
- Reassemble: Put the fan cover back in place, securing it with clips or screws, depending on the model. Turn the circuit breaker back on.
By incorporating this simple yet effective cleaning routine into your home maintenance, you ensure that your bathroom fan continues to efficiently combat odors and moisture, contributing to a healthier living space.


