Skip to main content

- Prepare the Cream:
- Ensure the heavy cream is at room temperature. This helps it whip more efficiently.
- Whipping the Cream:
- Pour the heavy cream into the mixing bowl.
- Using a stand mixer or hand mixer, start whipping the cream at medium speed. After a few minutes, the cream will thicken and form soft peaks. Continue whipping.
- Formation of Stiff Peaks:
- As you continue to whip, the cream will transition from soft peaks to stiff peaks. At this point, the fat globules in the cream have started to clump together, separating from the liquid (buttermilk).
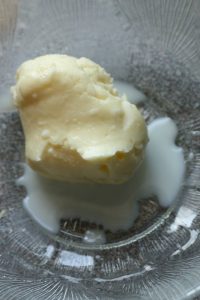
- Separation of Butter and Buttermilk:
- Keep whipping until you notice a clear separation between the butter and the buttermilk. The buttermilk will become more liquid, and you’ll see small butter granules forming.
- Drain Buttermilk:
- Once the separation is evident, stop the mixer. Place a cheesecloth or clean kitchen towel over a bowl and pour the mixture onto it. The liquid that drains through is the buttermilk.
- Rinse and Knead:
- Gather the butter in the cheesecloth and rinse it under cold water to remove any remaining buttermilk. Squeeze and knead the butter to help expel the last traces of buttermilk.
- Shape the Butter:
- If desired, you can shape the butter into a block or use molds for a decorative touch. Otherwise, you can keep it in its natural form.
- Storage:
- Transfer the butter to an airtight container and refrigerate. Freshly made butter can be used immediately, and it will last for several weeks when stored in the refrigerator.


