Author: Admin

Three different ways to cook shrimp that are amazingly good

Three different ways to cook shrimp that are amazingly good.

Recipe

Air Fryer Garlic Parmesan Shrimp

Ingredients:

1 bag frozen shrimp, thawed, shelled and deveined 12 oz.

1 tablespoon olive oil

2 teaspoons lemon pepper

1/2 teaspoon salt

1/2 teaspoon garlic powder

1 teaspoon minced garlic

1/2 cup fresh shredded Parmigiana Parmesan cheese

Pat dry your shrimp with a paper towel and place them in a medium bowl.

Add the olive oil, lemon pepper, salt, garlic powder, minced garlic, and cheese to the bowl and mix to coat all the shrimp.

Place the shrimp in the air fryer in a single layer, working in batches if necessary. Cook on manual setting, at 360°F for 10 minutes, turning the shrimp over after 5 minutes.

Serve and enjoy with a cocktail sauce, over pasta, or in a salad!

Bang Bang Shrimp

Ingredients:

Bang Bang Sauce

¼ cup mayonnaise

¼ cup Thai sweet chili sauce

Sriracha sauce , to taste

Fried Shrimp

½ cup buttermilk

¼ teaspoon onion powder

¼ teaspoon garlic powder

¼ teaspoon salt

1 pound large shrimp , peeled and deveined, tails removed

Canola oil , or peanut oil, for frying

¾ cup cornstarch

Instructions:

Bang Bang Sauce:

In a bowl, stir together the mayonnaise, chili sauce, and Sriracha until smooth.

Fried Shrimp:

In a large bowl, combine buttermilk, onion powder, garlic powder, and salt. Add the shrimp and stir to coat.

In a heavy-bottomed pan, add 2 to 3 inches of oil. Heat over medium heat until temperature reaches 375°F on a digital thermometer.

In a shallow bowl, add the cornstarch. Using tongs, remove 1 shrimp from the buttermilk marinade, letting any excess drip off, and coat each side in cornstarch.

Add the shrimp in batches to the oil and fry 1 to 2 minutes per side, until cooked through and light brown. Transfer to a paper towel-lined plate. Return oil temperature to 375°F and repeat with remaining shrimp.

Place in a serving bowl and add sauce. Toss to coat. Serve warm. Enjoy!

Cajun Garlic Butter Shrimp

Ingredients:

1 lb peeled and deveined large shrimp

4 tbsp salted butter

6 cloves of garlic finely chopped

2 tsp Cajun seasoning

1/2 tsp thyme

1 tsp red pepper flakes

1 tsp oyster sauce

2 tsp lemon juice

Instruction:

Place a light colored pan over medium heat. Once the pan is hot, add the butter and garlic, cook for 5-8 minutes until is it golden brown. Next, add the Cajun seasoning, thyme, and red pepper flakes to the pan and cook for another 2 minutes.

Add the oyster sauce and lemon juice to the pan, then add the shrimp. Sear the shrimp on each side for 2-3 minutes, until the shrimp is pink. Flip the shrimp and sear on the other side. Remove the pan from the stove and serve

Enjoy!

Read More

Crescent Roll Breakfast Casserole

Do you need an easy solution for a filling breakfast? This crescent roll breakfast casserole can be prepared the night before and baked in the oven in the morning. Loaded with sausage, eggs, cheese, and buttery crescent rolls, this simple-to-make breakfast makes any day feel special!

Easy Breakfast Casserole

I’m back with another super easy make-ahead breakfast recipe! This recipe for crescent roll breakfast casserole is quick to prepare and perfect for serving to a crowd for a Christmas morning breakfast, or to your family as a hearty weekday breakfast.

If you’ve visited here before, you probably know that I’m no stranger to easy breakfast casseroles! I just love how everything bakes up in one dish. My make-ahead breakfast casserole, hashbrown breakfast casserole and tater tot breakfast casserole are among my favorites! We even love this enchilada breakfast casserole for a change.

This crescent roll breakfast casserole starts with a tube of refrigerated crescent roll dough. You know the kind – it comes in a cardboard tube that you pop open. I usually have a tube or two hanging around in my fridge and I often use them for making my sausage breakfast pizza.

Next, you layer on some cooked crumbled sausage, cheese, and eggs. At this point, you can store the unbaked casserole in the fridge to bake in the morning or you can bake everything for about 35 minutes. Easy peasy!

Why This Recipe Works

  • Customizable. The great thing about this recipe, in addition to being able to make it ahead, is that you can also customize it to your tastes. Don’t like sausage? Try bacon instead. Want to add more veggies to your diet? Throw in what you have in the fridge. Keep reading to learn about some more variation ideas.
  • Taste and texture. The crescent roll dough puffs up as it bakes and absorbs some of the egg mixture to make a deliciously light and fluffy texture. Each mouthful is full of tasty sausage, buttery eggs and crescent rolls, and gooey cheese. It doesn’t get any better!
  • An anytime meal. Enjoy it on Christmas morning or Sunday brunch. Bring leftovers in your lunch the next day or have breakfast for dinner one night!

Recipe Ingredients

All of the ingredients are pretty straightforward for this recipe and you should be able to find them easily in most grocery stores.

Find the full printable recipe with specific measurements below.

  • Refrigerated crescent rolls: These are the ones that come in a tube. They usually have precut perforations on the dough that let you easily tear it apart to make crescent rolls. You can find these rolls in the refrigerated section of your grocery store, often near dairy products.
  • Breakfast sausage: My family loves the mild flavor of breakfast sausage, but feel free to use any variety of sausage that you like. 
  • Eggs: You need 8 large eggs for this recipe, which sounds like a lot, but the casserole is very hearty and filling, so it goes a long way.
  • Cheese: I use cheddar cheese with some Monterey jack for added flavor. Shredded cheese is always better when you grate it yourself.
  • VariationsDon’t you love when you can take a recipe and mix it up a little? Not only does it mean you can customize it to your tastes, but you can also use up ingredients you have on hand to make the recipe your own!Here are some ideas for variations to get you started:
    • For a different flavor, you can use sage sausage and Gruyere cheese.
    • Use biscuits instead of crescents like I do in breakfast casserole with biscuits!
    • You can use all cheddar or even substitute it with mozzarella cheese if you prefer.
    • Swap the pork sausage for diced baked ham or bacon crumbles. 
    • For a little kick, add a few dashes of hot sauce and red pepper flakes with the eggs. 
    • Add in some sauteed vegetables such as onions, bell peppers, or mushrooms.
    • Sprinkle some chopped green onions over the casserole for a hint of green.
    • Add some chopped fresh herbs for a fresh flavor.

    How to Make Crescent Roll Breakfast CasseroleFollow these easy instructions to make this delicious sausage crescent roll breakfast casserole!

  • Unroll crescent dough. Open up your tube of refrigerated crescent dough and press it into a greased baking dish. Remember to press the perforated edges together with your finger until the dough is as smooth as you can get it.
  • Cook sausage. Add your sausage to a skillet and cook until it’s browned, breaking it up into crumbles as it cooks. Let it drain on a paper towel-lined plate while you make the egg mixture.
  • Whisk eggs. Add the eggs to a large bowl and whisk as if you were making scrambled eggs. Add the milk and seasoning and whisk some more.
  • Assemble. Sprinkle the sausage over the dough, then the cheese in an even layer, and finally pour the egg mixture over the top of everything.
  • Bake. It takes 35 – 40 minutes at 375°F for the casserole to bake completely. Please let the casserole cool slightly before serving!
  • Expert Tips
    • Top browning too quickly? If it looks like the top of the casserole is browning too much before the middle of your casserole is cooked, cover the dish with aluminum foil while it continues to bake.
    • Drain the sausage. Don’t skip this step or you’ll end up with a greasy casserole. Line a plate with a paper towel and spoon the cooked sausage on top. The paper towel will absorb any additional grease.
    • Smooth out the crescent roll dough. Unrolled crescent roll dough has perforations in it that you normally use to tear the crescents apart. Press these perforations together with your finger to make the dough one smooth piece.
    • Grease the baking dish. Be sure to spray it with cooking spray. For easing slicing and serving, you want to create a nonstick surface so that once it is sliced, it comes out of the pan without falling apart.

Enjoy!

Read More

Mexican Brown Rice Bake – Gluten-Free

Ingredients:

  • 2 cups cooked brown rice
  • 1 cup black beans (drained and rinsed)
  • 1 cup corn kernels (fresh, frozen, or canned)
  • 1 cup diced tomatoes (canned or fresh)
  • 1/2 cup onion, finely chopped
  • 1/2 cup bell peppers, diced (any color)
  • 1 cup shredded cheddar cheese (or Mexican blend cheese)
  • 1/2 cup salsa (mild, medium, or spicy, based on your preference)
  • 1 teaspoon chili powder
  • 1 teaspoon cumin
  • 1/2 teaspoon smoked paprika
  • Salt and pepper, to taste
  • 1 tablespoon olive oil
  • 1/4 cup fresh cilantro, chopped (optional, for garnish)

Instructions:

Step 1: Preheat the Oven

  • Preheat your oven to 375°F (190°C)and lightly grease a baking dish with olive oil or cooking spray.

Step 2: Prepare the Rice Mixture

  1. In a large mixing bowl, combine the cooked brown riceblack beanscorndiced tomatoesonions, and bell peppers.
  2. Add the chili powdercuminsmoked paprikasalt, and pepper. Mix well to combine.

Step 3: Assemble the Casserole

  1. Spread half of the rice mixture evenly into the prepared baking dish.
  2. Drizzle with half of the salsa and sprinkle with half of the shredded cheese.
  3. Repeat with the remaining rice mixture, salsa, and cheese to create layers.

Step 4: Bake the Dish

  • Cover the dish with aluminum foil and bake for 20 minutes.
  • Remove the foil and bake for an additional 10–15 minutes, or until the cheese is bubbly and slightly golden.

Step 5: Garnish and Serve

  • Remove from the oven and let it cool for 5 minutes.
  • Garnish with freshly chopped cilantrobefore serving.

Serving Suggestions

  • Toppings: Add sliced avocado, sour cream, or jalapeños for extra flavor.
  • Side Dishes: Pair with a crisp green salad or a bowl of tortilla chips.
  • Leftovers: Store in an airtight container in the refrigerator for up to 3 days. Reheat in the oven or microwave.

Why You’ll Love This Recipe

  1. Gluten-Free: Perfect for those with gluten sensitivities or dietary preferences.
  2. Versatile: Customize with your favorite veggies, beans, or even shredded chicken.
  3. Easy Prep: Uses simple, everyday ingredients you likely have on hand.
  4. Meal Prep Friendly: Makes excellent leftovers that taste even better the next day!

Tips for Success

  1. Cook Rice Ahead of Time: Use leftover rice or cook it earlier to save time.
  2. Spice Level: Adjust the spice level by using mild or spicy salsa and adding more chili powder or cayenne pepper.
  3. Cheese Options: Experiment with pepper jack or Monterey jack for a twist.

Conclusion

This Mexican Brown Rice Bake is a satisfying, gluten-free casserole that’s full of bold flavors and nutritious ingredients. It’s perfect for a busy weeknight or as a crowd-pleasing dish for family gatherings. Easy to customize and packed with goodness, this recipe is sure to become a staple in your kitchen!

Enjoy!

Read More

Ham and Cheese Puff Pastry Pinwheels

Ingredients:

  • 1 sheet puff pastry (thawed if frozen)
  • 6–8 slices of ham (thinly sliced)
  • 1 cup shredded cheese (cheddar, mozzarella, or a mix)
  • 1 egg (for egg wash)
  • 1 tbsp Dijon mustard (optional, for extra flavor)
  • 1/2 tsp Italian seasoning or dried parsley (optional, for garnish)

Instructions:

  1. Preheat the oven:
    • Set the oven to 375°F (190°C) and line a baking sheet with parchment paper.
  2. Prepare the puff pastry:
    • Roll out the puff pastry sheet on a lightly floured surface into a rectangular shape.
  3. Layer the ingredients:
    • If using, spread a thin layer of Dijon mustard over the pastry.
    • Place the slices of ham evenly across the pastry.
    • Sprinkle the shredded cheese on top of the ham, spreading it evenly.
  4. Roll the pastry:
    • Starting from one of the long edges, tightly roll the puff pastry into a log. Seal the edge by pressing gently.
  5. Chill the roll:
    • Place the rolled pastry in the refrigerator for 10–15 minutes. This makes slicing easier.
  6. Slice into pinwheels:
    • Using a sharp knife, slice the chilled roll into 1/2-inch thick pieces.
  7. Prepare the pinwheels for baking:
    • Arrange the slices on the prepared baking sheet, leaving space between each pinwheel.
    • Beat the egg in a small bowl and brush the tops of the pinwheels with the egg wash. Sprinkle with Italian seasoning or parsley if desired.
  8. Bake:
    • Bake in the preheated oven for 15–20 minutes, or until the pinwheels are golden brown and puffed.
  9. Serve:
    • Let the pinwheels cool slightly before serving. Enjoy them warm or at room temperature as an appetizer, snack, or party treat.

These Ham and Cheese Puff Pastry Pinwheels are quick, delicious, and perfect for any occasion!

Enjoy!

Read More

Crispy Chicken Strips

Crispy Chicken Strips: A Family Favorite

Introduction

Crispy chicken strips are a beloved dish that combines juicy chicken with a satisfyingly crunchy coating. Perfect for family dinners, parties, or as a quick snack, these chicken strips are easy to prepare and guaranteed to be a hit with both kids and adults.

In this article, we’ll walk you through a simple recipe for making the ultimate crispy chicken strips.

Ingredients

To prepare these delicious crispy chicken strips, you will need the following ingredients:

  • 1 pound of chicken breast tenders
  • 1 cup of buttermilk
  • 1 teaspoon of garlic powder
  • 1 teaspoon of onion powder
  • 1 teaspoon of paprika
  • 1/2 teaspoon of salt
  • 1/2 teaspoon of black pepper
  • 2 cups of crushed cornflakes
  • 1 cup of all-purpose flour
  • 2 large eggs
  • Vegetable oil for frying

Instructions

Marinate the Chicken:

  1. In a large bowl, combine the buttermilk, garlic powder, onion powder, paprika, salt, and black pepper.
  2. Add the chicken tenders and ensure they are well-coated with the marinade.
  3. Cover and refrigerate for at least 30 minutes, or up to 2 hours for maximum flavor.

Prepare the Coating:

  1. In a shallow dish, place the crushed cornflakes.
  2. In another shallow dish, place the flour. In a third shallow dish, beat the eggs.

Coat the Chicken:

  1. Remove the chicken tenders from the buttermilk marinade, allowing any excess to drip off.
  2. Dredge each piece in the flour, shaking off any excess. Dip into the beaten eggs, then coat with the crushed cornflakes, pressing lightly to adhere.

Heat the Oil:

In a large skillet, heat about 1 inch of vegetable oil over medium-high heat until it reaches 350°F (175°C).

Fry the Chicken:

  1. Working in batches, carefully place the coated chicken strips into the hot oil.
  2. Fry for 4-5 minutes on each side, or until golden brown and cooked through.
  3. Use a slotted spoon to transfer the chicken to a paper towel-lined plate to drain.

Serve and Enjoy:

Serve the crispy chicken strips hot with your favorite dipping sauces, such as honey mustard, barbecue sauce, or ranch dressing.

Tips and Variations

  • Oven-Baked Option: For a healthier version, bake the chicken strips in a preheated oven at 400°F (200°C) for 20-25 minutes, or until golden brown and cooked through.
  • Spicy Kick: Add a teaspoon of cayenne pepper or hot sauce to the buttermilk marinade for an extra spicy version.
  • Different Coatings: Try using panko breadcrumbs or crushed pretzels for a different texture and flavor.

Conclusion

Crispy chicken strips are a versatile and crowd-pleasing dish that can be enjoyed in various ways. Whether served as a main course, appetizer, or snack, these homemade chicken strips are sure to become a favorite in your household. With a few simple ingredients and steps, you can create a delicious and satisfying meal that everyone will love.

Enjoy!

Read More

Cheesy Sausage and Potato Skillet

Ingredients:

  • 4 large potatoes, sliced into wedges
  • 2 tablespoons olive oil
  • Salt and pepper to taste
  • 1/2 teaspoon garlic powder
  • 1/2 teaspoon onion powder
  • 1/2 teaspoon smoked paprika (optional)
  • 12 oz (340g) smoked sausage, sliced
  • 1 cup shredded cheddar cheese
  • 1/2 cup heavy cream
  • 1/4 cup milk
  • 2 tablespoons butter
  • 2 tablespoons all-purpose flour
  • Chopped chives or green onions for garnish

Instructions:

Roast the Potatoes:

  1. Preheat your oven to 400°F (200°C).
  2. In a large mixing bowl, toss the potato wedges with olive oil, salt, pepper, garlic powder, onion powder, and smoked paprika until evenly coated.
  3. Spread the potatoes in a single layer on a baking sheet lined with parchment paper.
  4. Roast in the preheated oven for 25-30 minutes, turning halfway through, until the potatoes are golden and crispy.

Cook the Sausage:

  1. While the potatoes are roasting, heat a large skillet over medium heat.
  2. Add the sliced sausage to the skillet and cook until browned on both sides, about 5-7 minutes. Remove the sausage from the skillet and set aside.

Make the Cheese Sauce:

  1. In the same skillet, melt the butter over medium heat.
  2. Whisk in the flour and cook for 1-2 minutes to form a roux.
  3. Gradually add the milk and heavy cream, whisking constantly until the mixture thickens.
  4. Stir in the shredded cheddar cheese until melted and smooth. If the sauce is too thick, you can add a little more milk to reach the desired consistency.
  5. Season the sauce with salt and pepper to taste.

Assemble the Dish:

  1. Add the roasted potatoes and cooked sausage to the skillet with the cheese sauce.
  2. Toss everything together until the potatoes and sausage are well coated with the sauce.

Garnish and Serve:

  1. Garnish with chopped chives or green onions.
  2. Serve the dish hot, either as a main course or as a side dish.

This cheesy sausage and potato skillet is a perfect comfort food, great for a cozy dinner or a satisfying lunch. Enjoy the combination of flavors and textures!

Enjoy!

Read More

Brown Sugar Chicken Tenders

Ingredients:

  • 1 lb chicken tenders
  • 1 cup brown sugar
  • 1 teaspoon garlic powder
  • 1 teaspoon onion powder
  • 1 teaspoon smoked paprika
  • 1/2 teaspoon salt
  • 1/2 teaspoon black pepper
  • 1/4 teaspoon cayenne pepper (optional, for a little heat)
  • 8 slices bacon, cooked and crumbled
  • 2 tablespoons olive oil
  • 2 tablespoons unsalted butter
  • Fresh parsley, chopped (optional, for garnish)

Instructions:

  1. Prepare the Chicken: Start by preheating your oven to 400°F (200°C). Line a baking sheet with parchment paper or lightly grease it with cooking spray.
  2. Pat the chicken tenders dry with paper towels to remove any excess moisture. This will help the seasoning stick better.
  3. Season the Chicken: In a small bowl, mix together the brown sugar, garlic powder, onion powder, smoked paprika, salt, black pepper, and cayenne pepper (if using). Rub the brown sugar mixture all over the chicken tenders, ensuring each piece is well-coated.
  4. Cook the Bacon: If you haven’t already cooked the bacon, do so by frying it in a skillet over medium heat until it’s crispy. Once cooked, transfer the bacon to a paper towel-lined plate to drain, then crumble it into small pieces.
  5. Sear the Chicken: In a large skillet, heat the olive oil and butter over medium-high heat until the butter is melted and bubbling. Add the chicken tenders to the skillet, cooking them in batches if necessary to avoid overcrowding the pan. Sear the chicken on each side for about 2-3 minutes, or until they develop a golden-brown crust. The chicken doesn’t need to be fully cooked at this stage, as it will finish cooking in the oven.
  6. Bake the Chicken: Once the chicken tenders are seared, transfer them to the prepared baking sheet. Sprinkle the crumbled bacon evenly over the top of the chicken tenders. Place the baking sheet in the preheated oven and bake for 10-12 minutes, or until the chicken is fully cooked and reaches an internal temperature of 165°F (74°C).
  7. Serve and Enjoy: Remove the chicken tenders from the oven and let them rest for a few minutes before serving. The brown sugar will have caramelized, creating a sweet and sticky glaze on the chicken. Garnish with freshly chopped parsley if desired. Serve these brown sugar chicken tenders with your favorite dipping sauces, such as ranch, honey mustard, or barbecue sauce. They’re also great with a side of mashed potatoes, roasted vegetables, or a fresh salad.

Conclusion:

Brown sugar chicken tenders offer a delightful twist on a classic dish, combining the sweet, caramelized flavors of brown sugar with the savory, smoky taste of bacon.

The result is a dish that’s rich, flavorful, and utterly satisfying. Whether you’re serving them as a main course or an appetizer, these chicken tenders are sure to impress your family and friends.

The recipe is easy to follow and uses ingredients that you likely already have in your pantry.

The combination of spices adds depth to the flavor, while the brown sugar and bacon create a unique and delicious coating that elevates the dish to a whole new level.

So, the next time you’re in the mood for something comforting and delicious, give these brown sugar chicken tenders a try. They’re guaranteed to be a hit at any meal, leaving everyone at the table craving more.

Enjoy!

Read More

Hands down, the best way to eat potatoes! I love this one!

Simple Baked Potato Magic: Easy Recipes for Time-Crunched Foodies

A Guide to Using This Odd Appliance in the Kitchen

A Perfect Recipe for Crispy Air Fryer Baked Potatoes

Learn how to use an air fryer to make baked potatoes that are perfectly crispy and fluffy. Air Fryer Baked Potatoes are a convenient and delicious option whether you’re looking for a side dish to warm you up or the main course to round out your dinner. Your culinary skills will be elevated and your taste buds will be satisfied with this recipe’s minimum work and maximum flavor. Come along as we reveal the simple ways to make Air Fryer Baked Potatoes that are perfectly crispy.

Material Substances:

  • olive oil
  • Salt

Dip it in butter, bitter cream, cheese, chives, bacon pieces, or your favorite toppings—the choice is yours!

What to Do:

  1. Begin by washing the russet potatoes under cold water to remove any dirt or debris. Set aside. Dry them with a transparent dish towel.
  2. To prevent the potatoes from exploding during cooking, use a fork to puncture many holes around each one.
  3. To make the skin crispy, coat the potatoes evenly with olive oil, being sure to cover all surfaces. Then, season with salt. Add a liberal amount of salt to season both sides.
  4. To ensure consistent frying and crispiness, preheat your air fryer to 400°F (200°C) for around 5 minutes.
  5. After the air fryer is heated, carefully stack the seasoned potatoes in the basket, making sure they don’t overlap, so air can circulate evenly. This is how you make Ezoic Air Fry Potatoes.
  6. Put the potatoes in an air fryer and cook for 35 to 40 minutes, turning them over halfway through. The potatoes are done when they are soft on the inside and slightly browned on the outside; the exact amount of time to cook them depends on their size and thickness.
  7. Toss and Top: After the potatoes are cooked to your liking, remove them from the air fryer and set aside to cool for a few minutes. To make the potatoes fluffy, cut them lengthwise and then fluff them inside with a fork.
  8. Top the Air Fryer Baked Potatoes with your favorite toppings—butter, bitter cream, shredded cheese, chives, bacon pieces, or anything else you like—and serve them hot.

Delight in:

Savoring the delicious combination of crunchy exterior and fluffy potato flesh. Perfect for topping off any dish, these Air Fryer Baked Potatoes are sure to please.

Also, remember to check out Yorkshire puddings.

Even with the convenience of an air fryer, getting perfectly cooked potatoes—crisp and fluffy—has never been easier. Enjoy the classic comfort of baked potatoes with less work and time spent on this savory yet simple dish. No matter how you serve them, Air Fryer Baked Potatoes will quickly become a go-to side dish or main dish accompaniment. Get ready to enjoy the crispiness of those delicious potatoes by heating up your air fryer.

Enjoy!

Read More

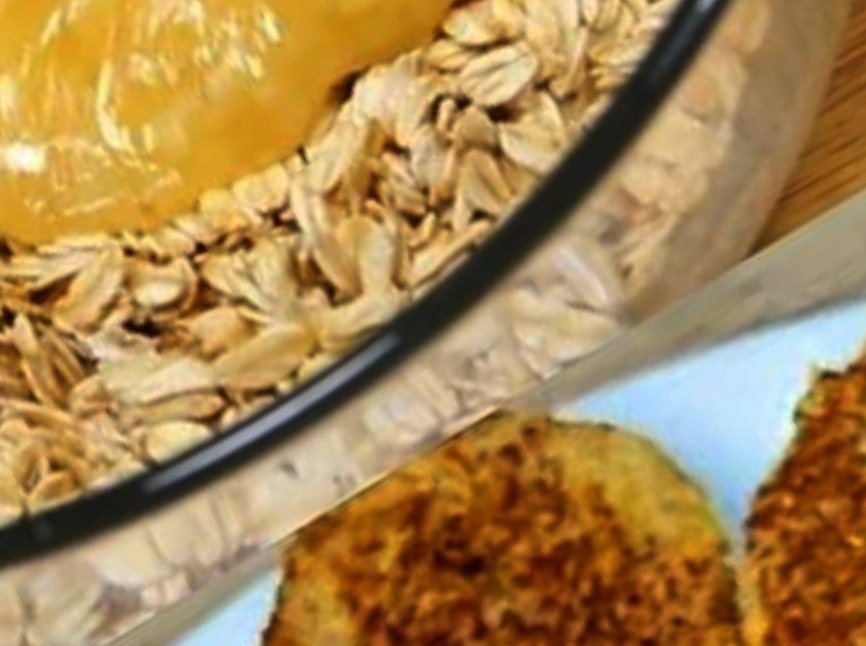
Sugar-Free Apple Banana Oatmeal Pancakes

Ingredients:

One cup of oats

1 grated apple

twenty-two milliliters of water

a single egg

a teaspoon of vanilla flavoring

1 mashed, ripe banana

Fry pan oil (like coconut or olive)

Instructions:

Get the Oats Ready:

Oatmeal and water should be mixed in a big basin. After a few minutes, the oats will have softened.

Banana and Apple Preparation:

Mash the banana and grate the apple. Mixed with the loosened oats, add them.

Combine the Substances:

Then, stir in the egg and vanilla essence with the oats. Thoroughly blend all components by mixing them together.

To make the pancakes, brush a nonstick skillet with a little oil and set it over medium heat.

Pancakes are made by spooning tiny portions of batter onto hot frying pan. To get a golden brown color and fully cooked, heat for about two to three minutes each side.

Continue with the rest of the batter, increasing the oil in the pan as necessary.

Hot pancakes are best served warm. They may be adorned with fresh fruit, yogurt, or sugar-free syrup as per your preference.

For an extra delicious touch, try serving it with some fresh berries.

Try it with some almond butter or Greek yogurt for a delicious combo.

Warm up with some tea or coffee and savor.

Advice for Cooks: For the juiciest results, use extremely ripe bananas.

A little cinnamon will enhance the taste.

Before adding the water, grind the oats into a fine powder if you want a smoother consistency.

Health Advantages:

A high-fiber food that may help you feel full for longer, oats are a fantastic choice.

Natural sugar and nutrient-dense bananas and apples are a great combination.

The carbs, protein, and healthy fats in these pancakes are all in their proper proportions.

Food and Nutrition Details:

Make sure the oats are gluten-free by checking the certification.

No Nuts: You won’t find any nuts in this recipe.

No Dairy: You won’t find any dairy in this dish.

Advice on Storing:

Leftover pancakes may be refrigerated for up to three days if sealed in a container.

Warm it up again in the oven or on the stovetop just before you serve it.

Additionally, these pancakes have a one-month shelf life when frozen. Line a freezer-safe bag with parchment paper to separate the layers. Prior to consumption, defrost and reheat.

What Makes This Recipe So Delightful:

The natural sweeteners, apple and banana, make it a better option for your health.

Oats and fruit together make for a delicious and filling snack.

Easy to whip up in a flash, ideal for a hectic morning.

All things considered, these sugar-free apple banana oatmeal pancakes make for a delicious and nutritious breakfast that won’t break the bank. Everyone loves them—kids and adults alike—for their delicious taste and tender texture. A healthy breakfast that the whole family will enjoy is waiting for you in this recipe!

Good appetite!

Enjoy!

Read More

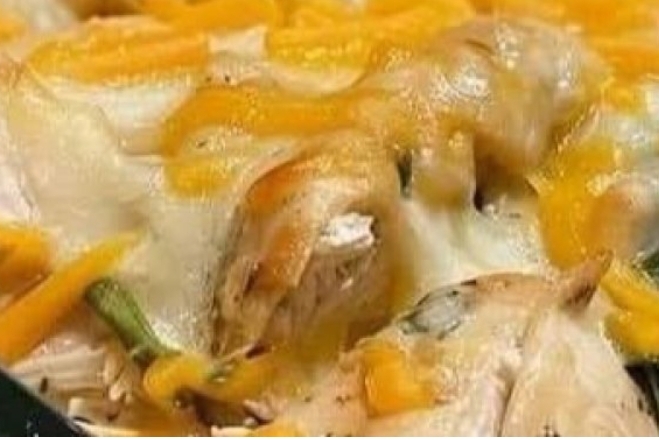
Chicken Tortilla Spinach Casserole

Ingredients:

3 cups cooked chicken, shredded

– 9-12 corn tortillas

– 2 cups fresh spinach, roughly chopped

– 1 large onion, diced

– 2 cloves garlic, minced

– 1 can (15 oz.) black beans, drained and rinsed

– 1 can (10 oz.) diced tomatoes with green chilies

– 2 cups shredded Mexican cheese blend

– 1 cup chicken broth

– 1 cup sour cream

– 1 teaspoon cumin

– 1 teaspoon chili powder

– 1/2 teaspoon smoked paprika

– Salt and pepper to taste

– Fresh cilantro, chopped (for garnish)

– Sliced avocado (optional, for garnish)

Instructions:

Preheat the oven to 375°F (190°C). Lightly grease a 9×13 inch baking dish.

Heat a sauté pan over medium heat. Add onions and garlic, cooking until translucent, then add the spinach and cook until just wilted. Remove from heat.

In a large bowl, mix the sautéed vegetables, chicken, black beans, diced tomatoes with their juices, sour cream, chicken broth, cumin, chili powder, paprika, salt, and pepper until well combined.

Layer the bottom of the prepared baking dish with a spread of the chicken mixture. Cover with a layer of corn tortillas, followed by a sprinkle of the shredded cheese. Repeat the layering process until all ingredients are used, finishing with a cheese layer on top.

Cover the dish with aluminum foil and bake for 25 minutes. Then, remove the foil and bake for an additional 10 minutes or until the cheese is melted and bubbling.

Let the casserole stand for 5 minutes before serving. Garnish with fresh cilantro and optional avocado slices.

Variations & Tips

– For a vegetarian twist, omit the chicken and double the beans, or substitute with quinoa for a protein-packed alternative.

– Those seeking a lower carb option can replace corn tortillas with thinly sliced zucchini or eggplant for a veggie-rich experience.

– For a creamier consistency, consider blending the sour cream with a block of softened cream cheese before adding it to the mix.

– Spice enthusiasts might incorporate a diced jalapeño into the vegetable sauté or a pinch of cayenne pepper for an extra kick.

– To make the dish even more decadent, a layer of refried beans may be spread onto the tortillas before adding the chicken mixture.

– Keep in mind, this casserole freezes beautifully. Simply cool it down completely, wrap it securely, and freeze. Thaw in the refrigerator before reheating in the oven.

Enjoy!

Read More