Author: Admin

Grandma’s Ground Beef Chow Mein Casserole

This classic midwestern casserole recipe comes straight from my grandma’s kitchen in Wisconsin. It was always one of my most anticipated meals whenever we went to visit her growing up.

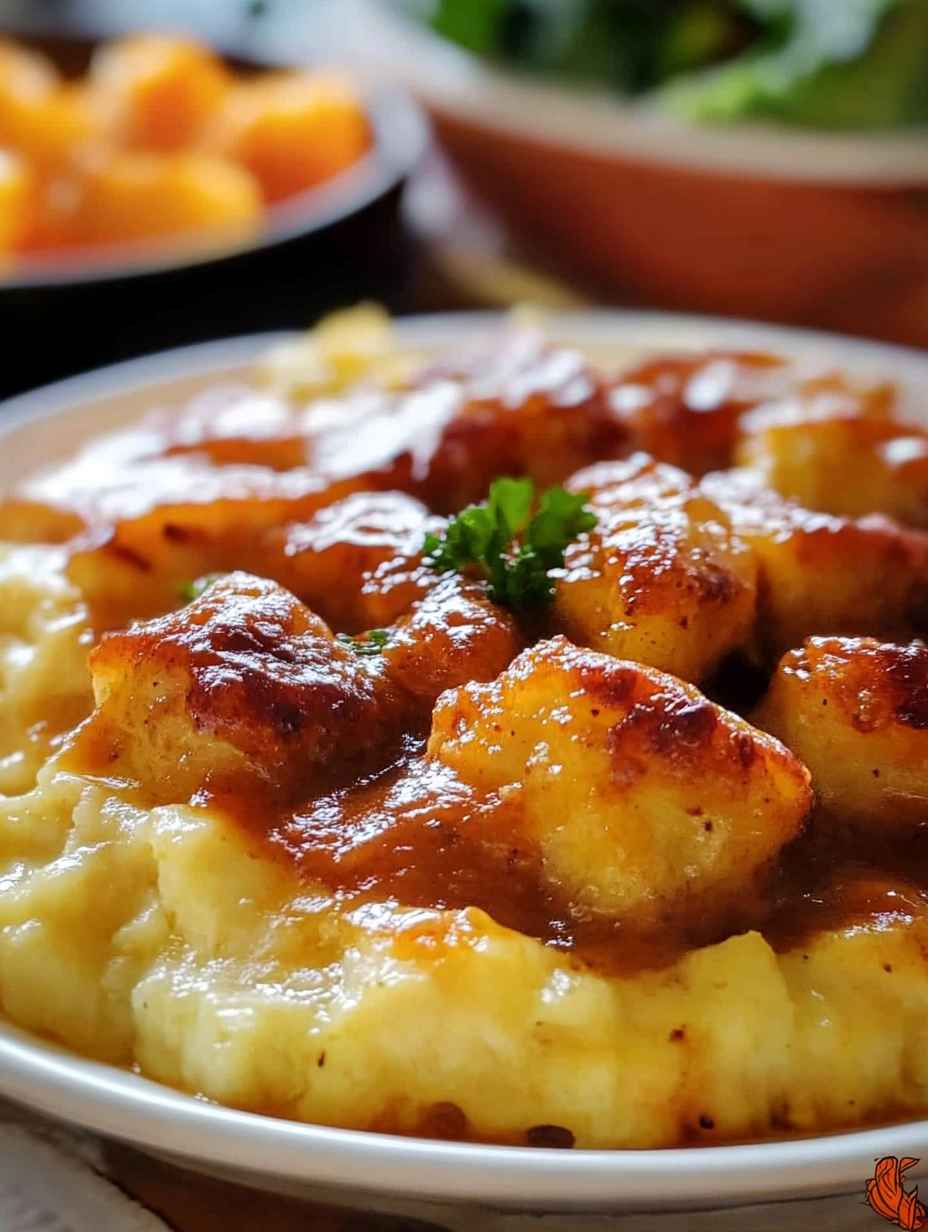
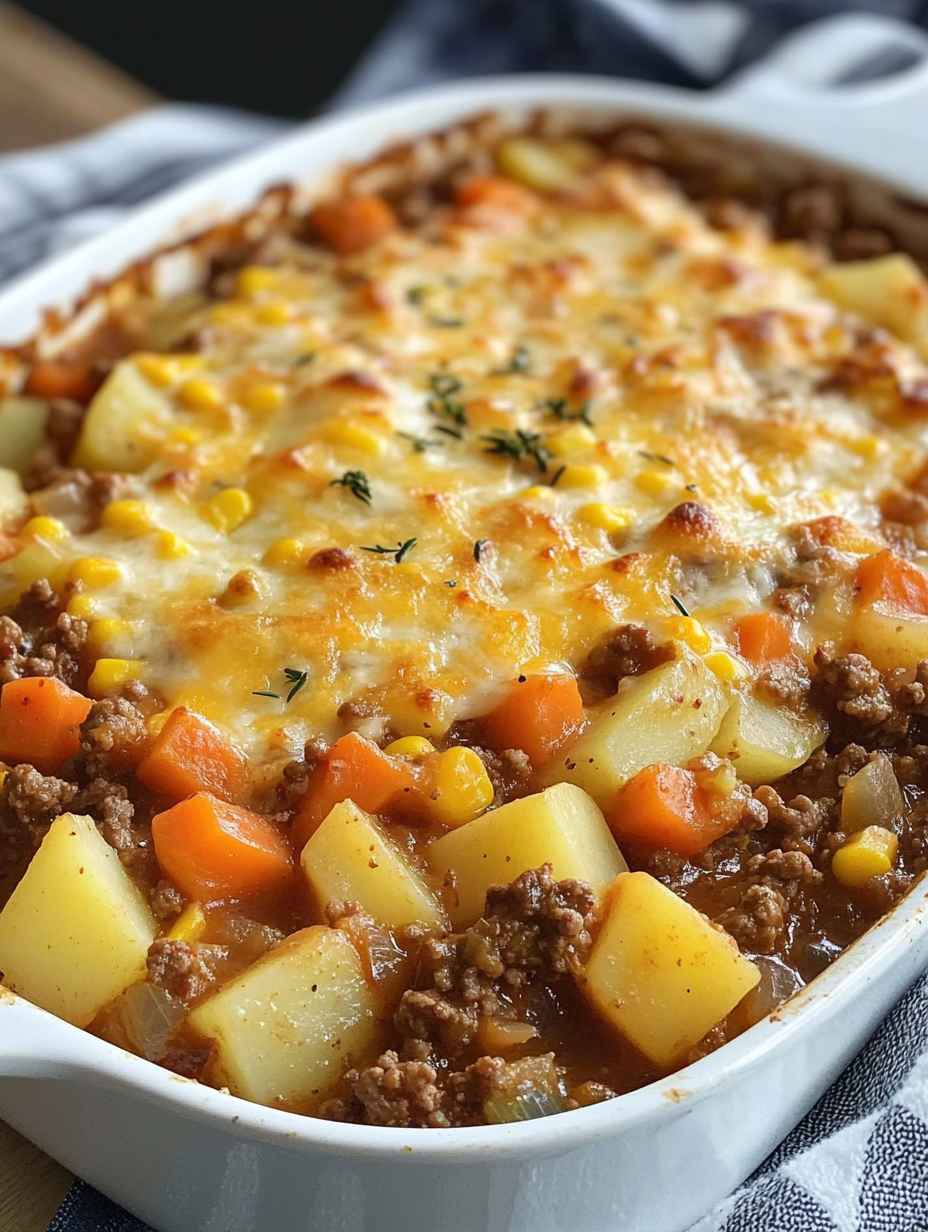
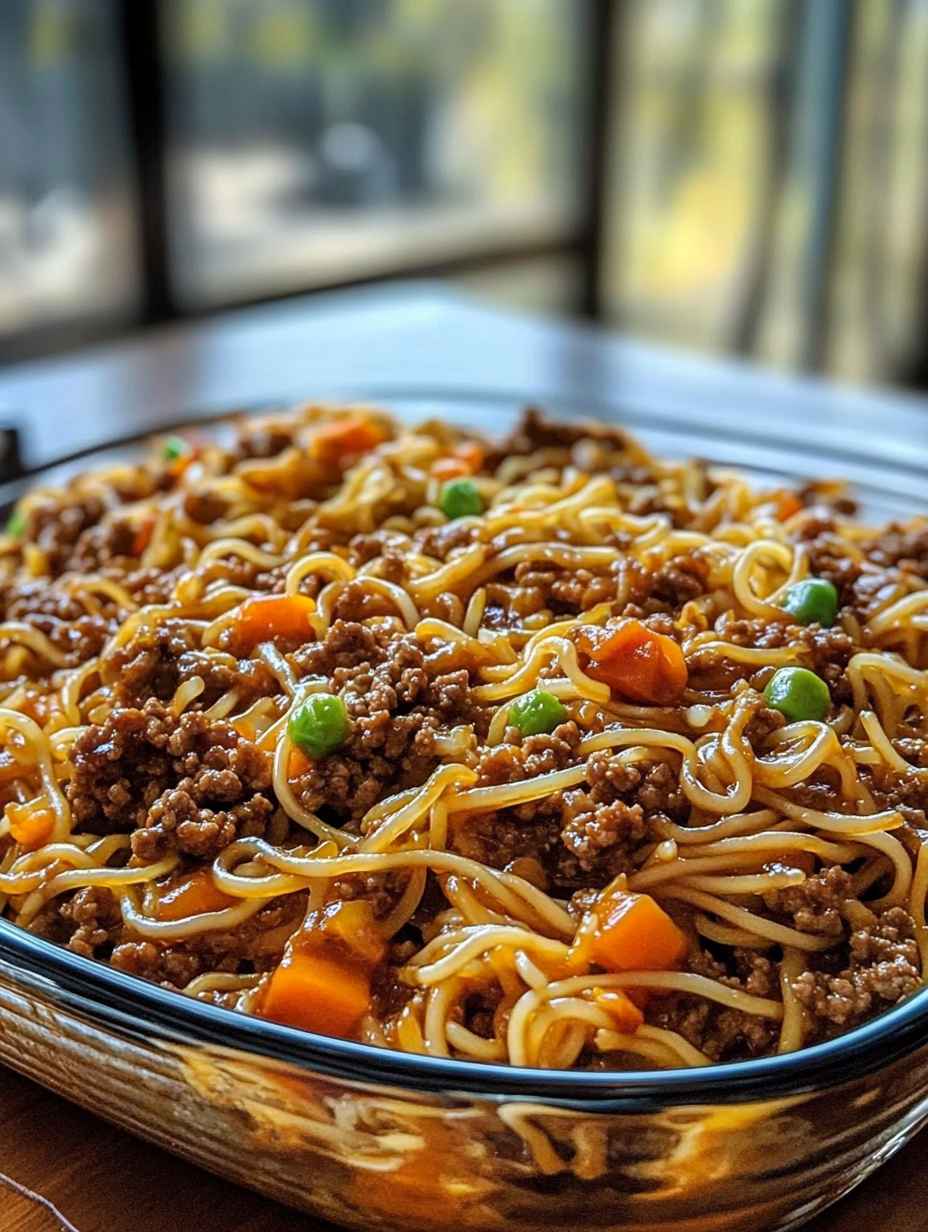
Grandma’s ground beef chow mein casserole, sometimes called chop suey casserole, combines tender ground beef and veggies with a creamy soup mixture and rice. It’s all baked up until hot and bubbly, then topped with crispy chow mein noodles for a crunchy finish.

I just love the blend of flavors and textures in this dish. The sautéed ground beef and onions give it some hearty savoriness. Diced celery and water chestnuts provide delicious crunch. And the combo of cream of chicken and cream of mushroom soups makes such a luscious, velvety sauce.

This satisfying all-in-one meal is a cinch to throw together and perfect for feeding a crowd. The best part is enjoying it fresh from the oven, steaming hot, with that crispy chow mein topping! I hope this childhood favorite becomes your new go-to comfort food casserole.

Grandma’s Ground Beef Chow Mein Casserole

No ratings yet

Print
Pin
Rate

Course: Main Course
Cuisine: Asian
Prep Time: 10 minutes
Cook Time: 1 hour 20 minutes
Total Time: 1 hour 30 minutes
Servings: 8
Calories: 376kcal

Ingredients

  • 1 pound ground beef browned and drained
  • 1 10.5 oz can cream of chicken soup
  • 1 10.5 oz can cream of mushroom soup
  • 1 onion diced
  • 1 cup celery chopped
  • 8 oz can water chestnuts drained and chopped
  • 1 cup uncooked white rice
  • 1 1/2 cups water
  • 3 tablespoons soy sauce
  • 5 oz chow mein noodles

Instructions

  • Preheat oven to 350°F. Grease a 9×13-inch baking dish.
  • In a large bowl, mix together cooked ground beef, soups, onion, celery, water chestnuts, rice, water and soy sauce.
  • Transfer mixture to prepared baking dish. Cover tightly with foil.
  • Bake for 1 hour 20 minutes until bubbly. Remove foil.
  • Sprinkle chow mein noodles evenly over the top. Bake uncovered for 10 more minutes.
  • Let sit for 5 minutes before serving. Enjoy!

Nutrition

Calories: 376kcal

Read More

Scottish Rumbledethumps

On chilly nights when I’m craving some old-fashioned comfort food, nothing hits the spot quite like rumbledethumps. This hearty Scottish casserole is the ultimate fridge clean-out meal, perfect for using up leftover mashed potatoes and vegetables.

Rumbledethumps has such a fun, quirky name that makes me smile. It’s also called stovies, clapshot, or even bubble and squeak by our friends across the pond. But no matter what you call it, this dish spells delicious!

Traditionally, rumbledethumps is a tasty combination of mashed potatoes and turnips or swedes, mixed together with melted butter and topped with savory cabbage or kale. I love the sweet, earthy flavor the turnips add. The cabbage provides delicious crunch after baking. And the crowning touch of melty cheddar cheese takes it over the top!

This cozy casserole bakes up with a crispy edge reminiscent of the best scalloped potatoes. It’s wonderful served up alongside a hearty stew or pot roast on a chilly evening. I also love serving it for brunch with a fried egg on top for a little protein boost.

However you choose to enjoy it, rumbledethumps is the epitome of comfort food – using up kitchen staples in the most crave-worthy way. It’s a treasured recipe I turn to when I need a taste of home and something warm and nourishing for my family. Give it a try and let thisScottish classic become one of your cozy favorites too!

Scottish Rumbledethumps

No ratings yet

Print
Pin
Rate

Course: Main Course
Cuisine: British
Prep Time: 15 minutes
Cook Time: 35 minutes
Total Time: 50 minutes
Servings: 6
Calories: 248kcal

Ingredients

  • 21 oz boiled and mashed russet potatoes about 3 medium potatoes
  • 14 oz boiled and mashed turnips about 2 medium turnips
  • 3 oz unsalted butter divided
  • 9 oz green cabbage thinly sliced (about 1/2 a head)
  • 1 oz sharp cheddar cheese grated (about 1/4 cup)
  • 1/2 teaspoon kosher salt
  • 1/4 teaspoon black pepper

Instructions

  • Preheat oven to 350°F. Grease a 9×9 inch baking dish with butter.
  • In a skillet over medium heat, melt 2 oz of butter. Add sliced cabbage and sauté for 5 minutes until slightly softened.
  • In a large bowl, combine mashed potatoes, mashed turnips, sautéed cabbage, remaining 1 oz butter, salt and pepper. Mash together well.
  • Transfer mixture to prepared baking dish and spread evenly. Top with grated cheddar cheese.
  • Bake for 30 minutes covered with foil. Uncover and bake 5 more minutes until top is lightly browned.
  • Let sit 5 minutes before serving. Enjoy!

Nutrition

Calories: 248kcal

Read More

Amish Hamburger with Fall Veggies Bake

As the weather turns crisp, I start craving hearty, comforting casseroles that feel like a big warm hug from the inside out. This Amish-style ground beef and veggie bake really hits the spot! It’s chock full of autumnal vegetables like potatoes, carrots, corn and tomatoes, all baked up with savory ground beef in a rich, herb infused sauce.

I love that this satisfying one-dish meal brings together the simple flavors of Amish cooking. Browning the beef with onions and garlic gives it such deep, meaty flavor. And the variety of fall veggies adds nice texture and wholesome goodness.

The cheesy, bubbly topping is my favorite part. I use sharp cheddar which gets beautifully browned and melted. But you could also use mozzarella or pepperjack for a tasty twist.

Serve this up on a blustery evening with some crusty bread, a crisp salad, or even mashed potatoes to soak up the delicious sauce. However you enjoy it, this hearty baked casserole screams cozy comfort food! It’s sure to become a new family favorite this autumn.

Amish Ground Beef and Vegetable Casserole

No ratings yet

Print
Pin
Rate

Course: Main Course
Cuisine: American
Prep Time: 15 minutes
Cook Time: 45 minutes
Total Time: 1 hour
Servings: 6
Calories: 300kcal

Ingredients

  • 1 pound lean ground beef
  • 1 medium yellow onion diced
  • 2 cloves garlic minced
  • 3 cups diced russet potatoes 1-inch pieces
  • 2 cups diced carrots
  • 1 cup diced celery
  • 1 cup frozen corn kernels thawed
  • 14.5 oz can petite diced tomatoes with juices
  • 1 cup low-sodium beef broth
  • 1 cup shredded sharp cheddar cheese
  • 1 teaspoon salt
  • 1/2 teaspoon black pepper
  • 1 teaspoon dried thyme
  • 1 teaspoon dried rosemary
  • 1 tablespoon olive oil

Instructions

  • Preheat oven to 375°F. Grease a 9×13-inch baking dish with nonstick spray.
  • In a large skillet over medium heat, cook ground beef in olive oil until browned and crumbled, about 5 minutes. Drain excess grease if needed. Transfer to a plate.
  • Add onion and garlic to the skillet. Sauté for 3-4 minutes until softened.
  • Add potatoes, carrots, celery, corn, diced tomatoes and beef broth. Season with salt, pepper, thyme and rosemary. Simmer for 5 minutes.
  • Transfer mixture to prepared baking dish. Top evenly with cooked ground beef.
  • Cover tightly with foil and bake for 30 minutes. Remove foil, top with shredded cheese and bake 10-15 minutes more until cheese is melted.
  • Let sit for 5 minutes before serving. Enjoy!

Nutrition

Calories: 300kcal

Read More

No Bake Chocolate Pie

Well, hi there! It’s Patty here from Patty’s Place. I’ve got a decadent chocolate pie recipe to share with y’all today that I just know you’re going to love. It’s smooth, creamy, and chocolatey – basically everything us gals dream about!

The best part is this chocolate pie recipe comes together lickety-split. No need to slave away in the kitchen for hours on end. We’ve got families to tend to and lives to live! With just a few simple ingredients, you’ll have a silky chocolate pie ready in no time at all.

I love serving this chocolate pie for gatherings big and small. It’s an easy dessert recipe that folks of all ages enjoy. The kids go crazy over the chocolatey layers and the grownups appreciate that it’s rich and indulgent but not too sweet. It’s the perfect make-ahead dessert too for potlucks and parties since it needs to chill in the fridge anyway.

Now don’t let the short ingredient list fool you. This pie tastes absolutely decadent! Let me walk you through how we’ll put it all together:

No Bake Chocolate Pie

No ratings yet

Print
Pin
Rate

Course: Dessert
Cuisine: American
Total Time: 2 hours 10 minutes
Servings: 8

Ingredients

For the Crust:

  • 36 Oreo cookies about 1 2/3 cups cookie crumbs
  • 6 tbsp unsalted butter melted

For the Filling:

  • 2 3.9 oz packages Jell-O chocolate flavor instant pudding mix
  • 1 3/4 cups cold whole milk
  • 1 8 oz container thawed frozen whipped topping, like Cool Whip
  • 1/2 cup mini semi-sweet chocolate chips for garnish

Instructions

Make the Crust:

  • Crush Oreos into fine crumbs by pulsing in a food processor or placing in a ziplock bag and rolling with a rolling pin.
  • Mix cookie crumbs with melted butter until well blended.
  • Press mixture firmly into a 9-inch pie dish. Refrigerate for 30 minutes.

Make the Filling:

  • Whisk together both packages of pudding mix and 1 3/4 cups milk in a large bowl until very thick and smooth, about 2 minutes.
  • Spread half the pudding evenly into chilled pie crust.

Make the Topping:

  • Fold remaining pudding together with half the tub of whipped topping until well blended.
  • Carefully spread this over the layer of pudding in the pie crust.

Finish the Pie:

  • Spread remaining whipped topping evenly over the top.
  • Refrigerate pie for at least 2 hours before serving.
  • Just before serving, garnish pie with mini chocolate chips.

Notes

Pie will keep well refrigerated for 2-3 days.
For longer storage, omit garnish, cover pie tightly and freeze for up to 2 months. Thaw overnight in fridge before serving.

Read More

Apple Crumble Bars

Well hi there, friends! It’s Patty here from Patty’s Place, back again with another sweet treat to share. Today I’ve got a recipe for old-fashioned apple crumble bars that I just know you’re going to adore.

There’s nothing that says “cozy” like warm, cinnamon-y apples baked under a crispy, crumbly topping. It’s the kind of from-scratch baking that reminds me of my mama’s kitchen. Now I’ve transformed that nostalgic apple crumble flavor we all love into easy, hand-held bar form.

These apple bars start with a simple shortbread crust. No need for fancy pie dough here! Just flour, butter, sugar and an egg pressed into a pan and baked until lightly golden.

Then we’ll pile on a hearty apple filling seasoned with cinnamon, nutmeg and a bit of flour to thicken those delicious juices. I use plenty of fresh diced Granny Smiths so there’s lots of bright apple flavor in every bite.

Finally, a crumbly oat topping is sprinkled over the apples and baked again until it’s perfectly crispy on top while the apples soften into jammy perfection underneath.

The end result? Apple crumble flavor for on-the-go! Grab an apple bar for a satisfying snack, or serve warm with ice cream for a fuss-free dessert. It fills the house with the most wonderful, nostalgic aroma as it bakes too.

I like to drizzle my bars with a bit of homemade salted caramel sauce to really take them over the top. But they’re so good on their own too. I hope you and your loved ones enjoy this easy apple treat as much as I do!

Blessings and Happy Baking!

Apple Crumble Bars

No ratings yet

Print
Pin
Rate

Course: Dessert
Cuisine: American
Prep Time: 20 minutes
Cook Time: 35 minutes
Total Time: 55 minutes
Servings: 12

Ingredients

For Base & Crumble Topping:

For Crumble Topping:

  • 1/3 cup old-fashioned rolled oats not quick or instant

For Apple Filling:

Instructions

Make Base:

  • Preheat oven to 350°F. Grease an 8-inch square baking pan.
  • In a bowl, mix melted butter with flour, sugar, baking powder and salt until combined.
  • Stir in egg until dough forms.
  • Reserve 1/3 of dough for topping. Press remaining 2/3 dough into prepared pan.
  • Bake 15 minutes until lightly golden. Cool 5 minutes.

Make Apple Filling:

  • In a bowl, toss together diced apples, flour, sugar, cinnamon and nutmeg.

Make Crumble Topping:

  • Mix oats into reserved 1/3 dough until incorporated.

Assemble & Bake Bars:

  • Spread apple filling over cooled crust.
  • Crumble oat topping over apples.
  • Bake 30-35 minutes until topping is deep golden brown.
  • Cool completely before cutting into bars.

Read More

Slow Cooker Baked Ziti

Well howdy folks! I’m back again with another crowd-pleasin’ recipe to share – Slow Cooker Baked Ziti. Now I know what you’re thinking…how can you bake ziti in a slow cooker? Well let me tell you, it’s easier than you think thanks to my simple recipe.

This slow cooker ziti is pure comfort food, from the hearty pasta loaded with rich, meaty sauce to that melted cheese on top…it’s absolute perfection after a long day. The best part is, you just brown the meat, throw everything in the cooker, and let it do its thing! No need to dirty extra pots and pans or slave over the stove.

I like to use ground beef for that classic flavor, but you could use turkey or Italian sausage too if you prefer. Then just sauté some onion and garlic, add your seasonings, canned diced tomatoes, pasta sauce, and broth. Mix it all up and add the dry pasta right in there too! It cooks up tender and delicious.

When it’s ready, sprinkle on some shredded mozzarella so it gets all melty and gooey. I’m telling you, this Baked Ziti is so satisfying and will warm you up on chilly nights. It also makes for easy leftovers or can be frozen for later.

I hope you’ll give this set-it-and-forget-it Slow Cooker Baked Ziti a try soon. Let me know if you have any favorite slow cooker pasta dishes to share!

Blessings and Happy Cooking!

Slow Cooker Baked Ziti

No ratings yet

Print
Pin
Rate

Course: Main Course
Cuisine: American
Prep Time: 15 minutes
Cook Time: 4 hours
Total Time: 4 hours 15 minutes
Servings: 6

Ingredients

  • 1 lb ground beef or ground turkey or Italian sausage
  • 1 onion finely chopped
  • 1 tsp minced garlic
  • 1 1/2 tsp salt
  • 1 tsp dried basil
  • 1 tsp dried parsley
  • 28 oz can diced tomatoes
  • 26 oz jar pasta sauce about 2 1/2 cups
  • 2 1/2 cups low sodium chicken broth
  • 12 oz box penne or ziti pasta about 3 cups dry
  • 2 cups shredded mozzarella cheese

Instructions

  • In a skillet, cook ground beef and onion over medium-high heat until browned, about 5 minutes. Add garlic, salt, basil and parsley and cook 1 minute more.
  • Transfer meat mixture to a 4-quart or larger slow cooker. Add diced tomatoes, pasta sauce and chicken broth. Stir to combine.
  • Cover and cook on LOW for 6 hours or HIGH for 3 hours.
  • Increase heat to HIGH. Add dry pasta and stir to submerge in sauce. Cover and cook 15 minutes, then check pasta for desired tenderness. Cook longer if needed, up to 30 minutes total.
  • Sprinkle mozzarella over top, cover and let sit 3-5 minutes until melted. Serve warm.

Read More

White Chicken Chili with Corn

Howdy folks! It’s me again, back with a hearty, soul-warmin’ white chicken chili recipe that the whole family’s sure to enjoy. There’s tender chunks of chicken, creamy beans, sweet corn, and a nice little kick – everything you want in a chili.

I just adore the subtle sweetness from that fresh corn in each bite. It adds so much flavor complexity and really takes this chicken chili up a notch. You all know how I love using fresh, in-season ingredients!

This white chili is pure comfort in a bowl. Perfect for chilly nights when you’re cravin’ something to stick to your ribs. And you can dress it up however your heart desires – maybe some crunchy Fritos, shredded cheddar, a dollop of sour cream or avocado…the options are endless!

Now, a few of you had asked about how to get this chicken corn chili extra thick and creamy. I like to add a block of cream cheese while it simmers. It gives such a rich, velvety texture. But no cream cheese? No problem! Just mix a bit of the broth with some cornstarch and stir it in. Easy as pie!

No matter how you choose to make it, this chicken and corn chili will warm you up from the inside out. I hope you’ll give this recipe a try soon and let me know how you like it! Maybe share it with a friend who’s looking for some comfort food.

Blessings and Happy Cookin’!

Creamy White Chicken Chili with Corn

No ratings yet

Print
Pin
Rate

Course: Main Course
Cuisine: American
Prep Time: 5 minutes
Cook Time: 35 minutes
Total Time: 40 minutes
Servings: 8

Ingredients

  • 1 tablespoon olive oil
  • 1 1/2 pounds boneless skinless chicken breasts or thighs, diced into 1/2″ pieces
  • 1 medium onion chopped into 1/2″ pieces
  • 1 1/2 teaspoons granulated garlic powder
  • 3 cups cooked great northern beans drained and rinsed (or 2 14-oz cans, drained)
  • 1 3/4 cups frozen or canned corn kernels drained (or 1 14-oz can, drained)
  • 2 cups chicken broth or 1 14-oz can
  • 2/3 cup chopped roasted green chiles or 1 7-oz can
  • 4 ounces cream cheese cubed (optional)
  • 1 teaspoon kosher salt adjust to taste
  • 1 teaspoon ground cumin
  • 1 teaspoon dried oregano
  • 1/2 teaspoon freshly ground black pepper adjust to taste
  • 1/4 teaspoon cayenne pepper
  • 1/2 cup sour cream
  • 1/2 cup heavy cream

Instructions

  • In a large pot, heat the olive oil over medium heat. Add the chicken and onion. Sauté for 5-7 minutes until chicken is cooked through. Sprinkle with the garlic powder while cooking.
  • Add the drained beans, corn, chicken broth, green chiles, cream cheese (if using), and all the spices. Bring to a boil.
  • Once boiling, reduce heat to low and simmer for 5 minutes, stirring occasionally.
  • Remove pot from heat. In a small bowl, whisk together the sour cream and heavy cream until smooth. Ladle 1⁄2 cup of the hot broth from the pot into the bowl and whisk again until fully incorporated.
  • Pour sour cream mixture into the pot and stir well to fully combine.
  • Serve warm, topped with any desired garnishes. Enjoy!

Notes

For a quicker version, use already cooked chicken and reduce simmering time to just 5 minutes after adding all ingredients.

Read More

I can’t seem to get tired of this dish; it’s been my favorite for weeks now

Ingredients:

1 pound of lean ground beef
6 ounces of cream cheese
3 eggs
5 cups of sliced mushrooms
2 tablespoons of butter
1 teaspoon of dried parsley
Salt and pepper to taste
Grated cheese of your choice (optional)

Instructions:

1. Preheat your oven to 350°F (175°C) and grease casserole dish.
2. In a large skillet, cook the lean ground beef over medium heat until it browns. Season with salt and pepper. Set aside.
3. Using a food processor, blend the cream cheese and add the eggs one at a time until a smooth mixture forms. Pour this creamy mixture over the ground beef and stir well to combine.

4. Transfer the ground beef and cream cheese mixture into casserole.
5. In the same skillet, melt the butter over medium heat, and cook the sliced mushrooms until they soften and turn a golden brown color. (Optional: add some garlic to mushrooms in this step.) Sprinkle the mushrooms with salt, dried parsley, and black pepper.

6. Place the sautéed mushrooms on top of the hamburger and cream cheese mixture in the casserole dish. If you prefer, you can also add grated cheese on top.
7. Bake the casserole for approximately 20 to 25 minutes, or until it sets. Be careful not to overcook it.

Now, my dear friend, armed with this compelling recipe, you can create a delightful dish that will captivate your taste buds and become a go-to favorite in your cooking repertoire. So, save this recipe, gather the ingredients, and prepare to embark on a culinary journey that will leave you and your loved ones wanting more.

Enjoy!

Read More

Chicken Cordon Bleu CasseroleCreamy Chicken Cordon Bleu Casserole with a Crunchy Topping

Ingredients:

3 cups cooked chicken, shredded
8 slices ham, chopped
1 cup Swiss cheese, shredded
1 cup cream of chicken soup
1/2 cup milk
1 teaspoon Dijon mustard
1/2 teaspoon garlic powder
1/2 teaspoon onion powder
1/4 teaspoon black pepper
1 cup breadcrumbs
2 tablespoons butter, melted
Fresh parsley, chopped (for garnish)

Instructions:

Preheat oven to 350°F (175°C).
In a large mixing bowl, combine the shredded chicken, chopped ham, and Swiss cheese.
In a separate bowl, whisk together the cream of chicken soup, milk, Dijon mustard, garlic powder, onion powder, and black pepper until smooth.
Pour the soup mixture over the chicken and ham, and stir until everything is well coated.
Transfer the mixture to a greased 9×13 inch baking dish, spreading it evenly.
In a small bowl, combine the breadcrumbs with the melted butter, mixing until the breadcrumbs are evenly coated.
Sprinkle the breadcrumb mixture over the chicken casserole.
Bake for 30-35 minutes, or until the casserole is bubbly and the top is golden brown.
Garnish with fresh parsley before serving.
Prep Time: 15 minutes | Cooking Time: 35 minutes | Total Time: 50 minutes
Kcal: 350 kcal | Servings: 6 servings

Enjoy!

Read More

Mexican side dishes to make and enjoy at home

Ingredients:

Mexican side dishes to make and enjoy at home.

Classic Guacamole

3 avocados, ripe

½ small yellow onion, finely diced

2 Roma tomatoes, diced

3 tablespoons finely chopped fresh cilantro

1 jalapeno pepper, seeds removed and finely diced

2 garlic cloves, minced

1 lime, juiced

½ teaspoon sea salt

Instructions:

Slice the avocados in half, remove the pit, and scoop into a mixing bowl.

Mash the avocado with a fork and make it as chunky or smooth as you’d like.

Add the remaining ingredients and stir together. Give it a taste test and add a pinch more salt or lime juice if needed.

Serve the guacamole with tortilla chips.

Classic Pico de Gallo

1 cup onion, chopped

1 medium jalapeño, ribs and seeds removed, finely chopped (decrease or omit if sensitive to spice, or add another if you love heat)

¼ cup lime juice

¾ teaspoon fine sea salt, more to taste

4 large ripe tomatoes, chopped

½ cup finely chopped fresh cilantro

In a medium serving bowl, combine the chopped onion, jalapeño, lime juice and salt. Let it marinate for about 5 minutes while you chop the tomatoes and cilantro.

Add the chopped tomatoes and cilantro to the bowl and stir to combine. Taste, and add more salt if the flavors don’t quite sing.

For the best flavor, let the mixture marinate for 15 minutes or several hours in the refrigerator. Serve as a dip. Pico de gallo keeps well in the refrigerator, covered, for up to 4 days.

Authentic Mexican Shrimp Ceviche

16 ounces raw shrimp, peeled and deveined

1 cup lime juice

½ red onion, diced

1 tomato, diced

1 jalapeño, diced

½ cup chopped cilantro

Pinch of salt and pepper

Directions:

Chop shrimp into small pieces then combine with lime juice in a large bowl. Mix the shrimp well, and cover and refrigerate the bowl for 1 hour, or until the shrimp have turned pink.

Add the red onion, diced tomato, diced jalapeño, cilantro, salt, and pepper to the bowl and mix well.

Serve the ceviche with tortilla chips and hot sauce, or however you want!

You can also toss in cucumber and avocado and serve (if desired you can strain off some of the juices). It’s delicious with tortilla chips or over tostada shells.

Enjoy!

Read More