Day: February 17, 2024

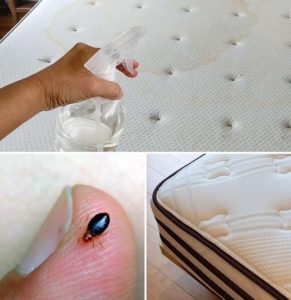
How to Naturally Clean and Disinfect Your Mattress?

There are a number of factors to consider before starting to clean a mattress. These include the type of mattress, and the reason for cleaning. Different cleaning methods should be used for each material and stain in order to get the best results.
Instructions

Cleaning with White Vinegar:

Dampen a sponge with the vinegar solution, ensuring it’s not too wet.

Gently rub the mattress surface in 20 cm squares on each side.

Rinse with a water-moistened glove.

Dry the mattress using a washcloth, covering the entire surface.

Pro Tip: White vinegar is also available in a convenient gel form.

Disinfecting with Soda Crystals:

Wear gloves and follow the manufacturer’s instructions.

Mix 2 tablespoons of soda crystals in 2 liters of hot water.

Apply the solution with a well-wrung sponge, rubbing the mattress thoroughly.

Rinse with clear water and dry using a cloth or a gentle setting on a hairdryer.

Deep Cleaning with Baking Soda:

Create a thick paste of baking soda and water to remove stains.

Spread the paste over stains, allowing it to dry for an hour before vacuuming.

For stubborn stains, use a mix of baking soda and vinegar, causing a bubbling reaction.

Let it dry and remove residue with a vacuum.

Eliminate odors by sprinkling baking soda over the mattress, leaving it for a few hours before vacuuming.

Using Dishwashing Liquid:
Mix 3 tablespoons of dishwashing liquid with 1 liter of hot water.
Stir to create a uniform mixture for the mattress surface.
Apply the mixture with a sponge or washcloth, ensuring thorough coverage.
Rinse with a cloth moistened in clean water, patting dry with towels, and let it air dry.
These natural methods will leave your mattress clean, disinfected, and refreshed without the use of harsh chemicals.

Read More

Unlock Stronger and Healthier Nails

Struggling with brittle nails can be frustrating, often caused by factors like frequent hand washing, weather conditions, or chemical products. For women who value the elegance of long nails, finding an effective solution to strengthen them is essential. Here’s a natural method to fortify fragile nails and maintain their health

Ingredients:

A cotton pad

A teaspoon of cider vinegar

A few drops of lemon essential oil (optional for added antiseptic benefits)

Instructions:

Read More

How and When to Harvest Peppers

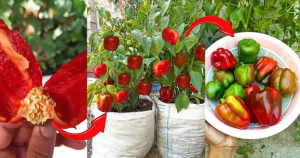
Harvesting peppers of all types is an important step in ensuring they are at their peak flavor and quality. The timing and method for harvesting peppers can vary depending on the type of pepper and your preferences. Here’s a general guide on how and when to harvest peppers:

1. Timing:

The timing for harvesting peppers depends on the type and variety. Most peppers are ready for harvest when they reach their mature color and size. Here are some general guidelines for common types of peppers:

  • Bell Peppers: Harvest when they reach their full size and have turned their mature color (usually green, red, yellow, or orange). Green bell peppers are less ripe and have a slightly different flavor than colored ones.
  • Hot Peppers (e.g., jalapeños, habaneros): These can be harvested when they reach their mature color. The heat level may increase as they ripen and change color. You can harvest them when they are green, or wait until they turn red, yellow, or orange, depending on the variety.
  • Sweet Peppers (e.g., banana peppers, cubanelles): Harvest when they reach their mature color, which can vary from green to yellow to red, depending on the variety.
  • Chili Peppers: Harvest when they reach their mature color and size. Chili peppers come in various shapes and colors, so refer to the specific variety for guidance.
  • Paprika Peppers: These are typically harvested when they turn red or deep red. They are often dried and ground to make paprika.

2. Method: To harvest peppers, follow these steps:

Read More

Crunchwrap Supreme

Here’s how to make one at home — and I’m not afraid to say it’s even better than the one you’d pick up at the drive-through.

Ingredients:

  • 1 pound lean ground beef
  • 1 packet of taco seasoning
  • 6 large flour tortillas
  • 6 tostada shells
  • 1 cup nacho cheese sauce
  • 1 cup shredded lettuce
  • 1 cup diced tomatoes
  • 1/2 cup diced onions
  • 1 cup shredded cheddar cheese
  • Sour cream (optional)
  • Sliced jalapenos (optional)

Instructions:

Read More

This Simple Trick for Cleaning Bathroom Tiles is 100 Times More Powerful Than Chlorine

There is nothing quite like grimy grout and tired old tiles to make a kitchen or bathroom look dull and lifeless.
If not taken care of properly, grout and tile start looking a little, well, disgusting to say the least (I know from first-hand experience – yuck!). These also tend to harbour mold and mildew, which pose serious health risks.
Effective Homemade Cleaner
If you’re wondering about the best ways to clean your tiles and grout, all you need to do is look to nature (and your muscles).
Keep in mind that if you’re wanting to really get rid of the grime in your grout and tiling edges, a strenuous scrubbing is absolutely necessary to get into the tiny pores of the grout (no matter if you’re using natural products or a chemical product). Heavy scrubbing will also kill the root of the mildew and mold, and remove any lingering soap residue. An old toothbrush or a tough scrubbing pad should work perfectly for this job!
The homemade cleaner below is great because it only requires three cheap ingredients, which you probably have lying around your kitchen anyway. Another great benefit of this cleaner is that it is safe for the environment, and your health.

You will need the following ingredients:

1/2 cup of baking soda

1/4 cup hydrogen peroxide

1/2 cup white vinegar

4 litres of water

optional: 10-20 drops tea tree oil

Method:

1. In a large bucket, combine the water and baking soda.

2. Let it dissolve, and little by little, start adding the white vinegar.

3. Next, add the hydrogen peroxide and keep stirring until everything is well integrated. At this time, you can add the tea tree oil if you’re using. There might be a little foam as a result of the reaction between the vinegar and baking soda, but this is normal and will dissolve with time.

4. Once the foam settles, add the mixture to a spray bottle so that it can be easily utilized (you might need a couple spray bottles to fill up, but it’ll last you a long time!).

5. Spray the mixture onto the mold and mildew and let sit for 20-30 minutes. Then, take a scrubby brush and start putting in some elbow grease. Once finished, rinse with water.

If you have a favourite all-natural cleaner, let me know in the comments below! Or, if you tried this recipe, let me know how it worked for you!


Read More

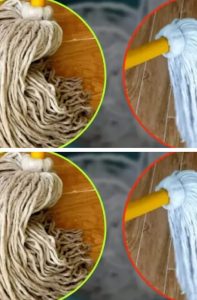
Very dirty mop, don’t buy it again: a drop of this ingredient and it will be new again

Mop for very dirty floors, we use it at any time of the day to remove any type of dirt, with the addition of hundreds of chemicals.

To make sure you clean the floor thoroughly, disinfecting it effectively and therefore eliminating germs and bacteria, you need to wash the mop every time you use it.

Like all the utensils we use at home, the mop also requires attention, hygiene and cleaning. Very comfortable and easy to use, very practical because with one pass the floors are clean, shiny and dry , but if the mop is not as clean as it should be, should the work done is practically zero, useless.

When to wash the mop and retrieve it and when to throw it away

Normally when the mop is dirty you think about throwing it away and buying another one . This behavior is incorrect, because the mop is only thrown into the trash when it is irreversibly worn and therefore it is impossible to clean it properly , as is done with the rags.

However, when it is still new or almost new it is enough to clean it in an ecological, economical and natural way with home remedies that come from ancient times.

An effective remedy to clean the mop, baking soda.

The effective remedy to clean the mop is the use of baking soda , which is useful at any time and occasion in the kitchen, because it allows you to sanitize and thoroughly clean not only the kitchen utensils , but apparently also the utensils used for washing. the floor.

Simply pour half a glass of baking soda into a bucket of warm water and then soak the rags or mop for a couple of hours . Once the established time has passed, rinse until the water is clear. If you want, you can wash the mop, even in the washing machine, always using baking soda. In this case, the product is placed in the detergent drawer, then the temperature is set to at least 70 degrees and washing begins.

Continue reading this amazing recipe on the next page

Read More

Guaranteed Success: Growing a Mango Tree from Leaves

Growing a mango tree from leaves can be a rewarding experience, and with the right approach, you can achieve a 100% success rate. Follow these steps to ensure a healthy and thriving mango tree:

Materials You’ll Need:

Fresh mango leaves (select healthy and disease-free leaves)

A small pot with drainage holes

Well-draining potting mix

Plastic wrap or a clear plastic bag

Rubber bands or twist ties

A warm and well-lit location

Patience

STEPS :

Step 1:

Leaf Selection Choose healthy mango leaves from a mature tree. Ensure they are free from pests and diseases, as this will increase your chances of success.

Step 2:

Preparing the Pot Fill a small pot with well-draining potting mix. Make a small hole in the center for planting your mango leaf.

Step 3:

Planting the Leaf Take a healthy mango leaf and cut it into smaller sections, ensuring that each section has a portion of the main vein. Plant the leaf section with the main vein facing down into the prepared potting mix. Water lightly.

Step 4:

Creating a Mini Greenhouse Cover the pot with plastic wrap or place it in a clear plastic bag to create a mini greenhouse effect. This helps maintain humidity around the leaf.

Step 5:

Securing the Plastic Use rubber bands or twist ties to secure the plastic around the pot. Leave enough space at the top to allow for air circulation.

Step 6:

Providing the Right Environment Place the pot in a warm and well-lit location with indirect sunlight. Ensure the temperature remains consistently warm, ideally between 75°F to 85°F (24°C to 29°C).

Step 7:

Patience and Care It may take several weeks to a few months for your mango leaf to show signs of growth. Be patient and keep the soil consistently moist but not waterlogged. Check for signs of mold or fungus and remove them if necessary.

Step 8:

Transplanting Once your mango seedling has grown a few inches and has developed a strong root system, it’s time to transplant it into a larger pot or directly into your garden if the weather permits

Step 9:

Maintenance Continue to care for your mango tree as it grows, providing adequate sunlight, water, and nutrients. Protect it from pests and diseases by inspecting regularly and taking necessary measures.

With proper care and patience, your mango tree will thrive and eventually bear delicious mangoes. Growing a mango tree from leaves can be a rewarding journey, and with these steps, you’re on your way to success.

Read More