Day: January 18, 2024

How to Sterilize Your Soil To Get Rid of Pests

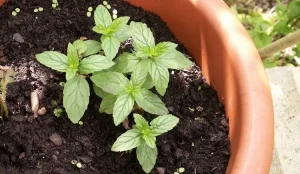
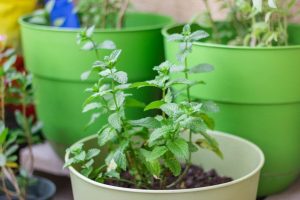
Sterilizing your soil is a crucial step in preventing pests and diseases that can harm your plants. There are several effective methods you can use, depending on the amount of soil you need to sterilize and the resources available to you.

Solarization

Solarization is a great option for large garden beds. This method involves covering the soil with transparent or clear plastic to trap the sun’s rays, thereby heating the soil. It’s important to prepare the soil by raking away debris and irrigating well before covering. Anchor the plastic down tightly, possibly using a trench around the garden to eliminate air pockets. Solarization requires around 4-6 weeks of full sun exposure and is less likely to harm beneficial microbes. However, it may not be effective against certain heat-tolerant diseases and aggressive weeds.

Oven Sterilization

Read More

Aluminum and coarse salt

Maintaining the shine on various surfaces and objects can be a time-consuming chore. Whether it’s cutlery, surfaces, or metals, achieving that perfect gleam often feels like an elusive goal. However, there’s a simple and effective solution that can transform your cleaning routine and bring back the sparkle to your belongings. This method involves the versatile use of aluminum and a few common household ingredients. Discover the secret to effortlessly polishing and cleaning with this innovative approach.

The Power of Aluminum and Salt for Shiny Objects:

Among the array of products and techniques used for polishing, the humble aluminum foil emerges as a surprising ally. Found in every home and commonly used for food storage, aluminum possesses hidden properties that can revolutionize your cleaning process.

Ingredients Needed:

  • Aluminum foil (twice the length of the container)
  • Coarse salt (2 tablespoons)
  • Baking soda (1 tablespoon)
  • Hot water

Procedure for Polishing Objects:

Read More

Delight Your Taste Buds with Homemade Prickly Pear Jelly

Prickly pears, with their vibrant hues and unique flavor, offer a delicious twist to homemade jams. Making your own Prickly Pear Jelly is not only a delightful culinary adventure but also a way to savor the distinct taste of these succulent fruits in a spreadable form. In this article, we’ll guide you through a simple yet flavorful recipe that captures the essence of prickly pears in a jar. Get ready to embark on a journey of culinary creativity with this Homemade Prickly Pear Jelly recipe.

Ingredients:

  • 3 cups prickly pear juice (approximately 15-20 prickly pears)
  • 1/4 cup lemon juice (about 2 lemons)
  • 1 package (1.75 oz) fruit pectin
  • 4 1/2 cups granulated sugar

Instructions:

Read More

How to Clean a Dirty Toilet and Get Rid of Urine Smell on Sofa

Moving into an older home often presents challenges, and one area that can quickly become unsanitary is the bathroom. Issues like rust, humidity, and stubborn stains not only affect the aesthetics but can also contribute to unpleasant odors. Fortunately, there’s a clever System D trick that can efficiently disinfect the bathroom, and the best part is, it’s simpler than it appears. Learn how to banish these inconveniences and give your home a thorough spring cleaning with this versatile method that can be applied to various surfaces.

Addressing Common Household Issues:

Stained vases, lingering odors in toilets or sofas—these are everyday nuisances that can be easily resolved with cost-effective and efficient solutions. The ingredients for these tricks are readily available in your kitchen, making them accessible for practical use.

Application of the Cleaning Method:

Sometimes, persistent bacteria create wet spots on delicate surfaces, such as a vase, resisting conventional cleaning products. This same issue can also affect toilets, leading to unpleasant smells and potential rust. The homemade cleaner recommended here not only neutralizes odors but also deeply purifies surfaces.

How to Clean a Dirty Toilet:

Read More

How to grow grapes from seeds (in containers)

Grapes, with their luscious clusters and diverse flavors, have captivated human taste buds for centuries. While most grapevines are propagated through cuttings or grafting, growing grapes from seeds in containers is an adventurous and rewarding endeavor for gardening enthusiasts. It’s a process that requires patience, attention to detail, and a bit of finesse. Here’s a comprehensive guide on how to grow grapes from seeds in containers, including tips, tricks, and expert advice.

1. Acquiring Grape Seeds:

To start your grape-growing journey, begin by procuring seeds from a variety of grapes you wish to cultivate. Extracting seeds from fresh grapes is a straightforward process:

  • Choose ripe grapes from a healthy and robust vine.
  • Gently crush the grapes and separate the seeds from the pulp.
  • Rinse the seeds to remove any remaining pulp or residue.

2. Seed Preparation:

Before germination, it’s beneficial to stratify grape seeds to simulate natural conditions that trigger germination. Follow these steps:

  • Place the seeds in a damp paper towel.
  • Seal them in a plastic bag and refrigerate for 2-3 months. This mimics the winter period, encouraging the seeds to prepare for sprouting.

3. Germination Process:

After stratification, it’s time to initiate germination:

Read More

Dirty light switch, make it like new

In our daily routines, we often flick our light switches without realizing that our hands may not be entirely clean, leading to the gradual accumulation of germs, bacteria, and unsightly stains on these frequently touched devices. This article aims to share effective and simple methods to ensure your light switch stays spotless, free from dust, and functions optimally.

Methods to Clean Light Switches:

To maintain a clean and fully operational light switch, we can turn to time-tested methods that leverage common household ingredients, often proving more effective than commercial cleaning products.

Read More

Crafting a Huge Pot of Chili at Home

There’s nothing quite like the comforting aroma of a simmering pot of chili to warm up your home and tantalize your taste buds. Whether you’re feeding a crowd or simply looking to stock up on delicious, hearty meals, making a huge pot of chili is a perfect culinary adventure. In this article, we’ll guide you through a scrumptious recipe for creating a massive pot of chili that promises to be a crowd-pleaser.

Ingredients:

  • 3 lbs ground beef
  • 2 large onions, diced
  • 4 cloves garlic, minced
  • 2 bell peppers (red and green), diced
  • 2 cans (28 oz each) crushed tomatoes
  • 2 cans (15 oz each) kidney beans, drained and rinsed
  • 1 can (15 oz) black beans, drained and rinsed
  • 1 can (15 oz) corn kernels, drained
  • 1/4 cup chili powder
  • 1 tablespoon cumin
  • 1 tablespoon smoked paprika
  • 1 teaspoon cayenne pepper (adjust to taste)
  • Salt and pepper to taste
  • 2 cups beef or vegetable broth
  • Optional toppings: shredded cheese, sour cream, chopped green onions, cilantro

Instructions:

Read More

Transform Your Home with the Fragrance of Fresh Mint

Creating a comfortable and personalized haven is a universal desire, and our homes serve as the ultimate refuge where we seek solace after challenging days. As our appreciation for the importance of home deepens, especially in the wake of the pandemic, the focus on caring for our living spaces has grown, driven by the desire to feel content and at ease in our own surroundings.

Amid this quest for home improvement, plants have emerged as cherished companions, offering a touch of nature that enhances the beauty, warmth, and overall ambiance of our living spaces. If you’re a plant enthusiast seeking creative ways to integrate greenery into your home, this tutorial is for you – a guide to planting mint in a pot, bringing not only aesthetic appeal but also a refreshing fragrance to your living space.

Planting Mint in a Pot:

When you plant mint in small pots, you have the flexibility to position it in various areas, allowing its invigorating scent to permeate throughout your home. Follow these simple steps to successfully plant and cultivate mint in a pot:

Read More

A Quick 5-Minute Trick for Sparkling Clean Objects

Certainly, you’ve observed that over time, some components start to rust, especially if they aren’t made of stainless steel. This occurs due to exposure to moisture coupled with a lack of maintenance—two critical factors that can significantly diminish the lifespan of items like bicycle tires or kitchen sinks.

However, don’t rush to discard them just yet. Learn about this highly effective method to eliminate rust and restore the shine to all your worn-out objects. By using natural ingredients, in just a few minutes and with minimal effort, your metal pieces can look as good as new.

Understanding Rust Formation: When metal parts rust, a reddish-brown flaky layer develops on their surface. This corrosion process happens when iron or its alloys, such as steel, react with a combination of oxygen and water. While commercial rust-removal products exist, they are often expensive and laden with chemicals. Instead, consider using this homemade recipe that primarily employs natural and environmentally friendly ingredients, providing an added bonus of versatility for other purposes.

Recipe and Method:

Continue reading on the next page

Read More