Day: January 5, 2024

Is Your Sink Or Faucet Covered In Hard Water Stains?

Sinks and faucets can get covered in hard water stains easily. Cleaning them isn’t easy for most of people. In addition to that, they look dirty and old. Luckily, there is a great and effective method that will help you remove these.

You will need:

  • Distilled vinegar
  • An old cloth or rag
  • A green and yellow sponge

You only need to soak the cloth or rag in vinegar before wrapping  the rag on the hard water marks for about an hour. Start removing the rag after time is up before scrubbing at the spots using a sponge.

Your sinks and faucets will look as if you just bought them! This method can work also for water stains on porcelain sinks and tile.

Read More

In fact, it’s not so dirty to wear your shoes indoors

Before stepping into someone’s home, you may encounter the age-old dilemma – to remove or not to remove your shoes. This debate spans across cultures, driven by a myriad of reasons ranging from practicality to religious beliefs. In the United States, discussions about wearing shoes indoors often revolve around concerns about bacteria and dirt. However, delving into the microbial world on our footwear reveals a more nuanced perspective.

Across the globe, the tradition of removing shoes before entering a residence is widespread. In the United States, the discourse often centers on the potential health hazards associated with bringing outdoor contaminants inside. Studies have indeed identified bacteria like E.coli and Staphylococcus aureus on shoes, with the latter capable of causing skin and blood infections. Despite these findings, the risk of contracting illness from the bacteria on shoes is considered minimal for healthy individuals.

Kevin Garey, a clinical pharmacist and professor, emphasizes that the typical footprint lacks the concentration of microbes required to pose a significant health risk. While shoes may carry residues of pesticides, herbicides, or construction materials, the likelihood of these substances leading to disease transmission remains low. Health risks associated with such residues range from minor skin or eye irritation to more serious concerns like cancer. However, bringing trace amounts of these substances into one’s home through shoes is unlikely to elevate the risk of disease.

Read More

White Velvet Cake

Ingredients

FOR THE CAKE:

• 1 3/4 cups cake flour

• 1 1/2 cups plus 2 tablespoons granulated sugar

• 1 teaspoon salt

• 1 tablespoon baking powder

• 1/2 teaspoons baking soda

• 2 egg whites, at room temperature

• 1 1/4 cups buttermilk, at room temperature, divided

• 1/2 vegetable oil, divided

• 1 1/2 teaspoons vanilla extract

• 12 tablespoons (1 1/2 sticks) unsalted butter, softened

FOR THE FROSTING:

• 1 3/4 cups granulated sugar

• 2 tablespoons all-purpose flour

• 1 cup whole milk

• 3 sticks unsalted butter, room temperature

• 1 1/2 teaspoons vanilla extract

• 1/2 teaspoon almond extract

• 1/4 teaspoon salt

Preparation

Read More

Grow and Make Your Own Sugar

Growing sugar beets and making your own sugar can be a rewarding and educational gardening project. Here’s a comprehensive guide to help you through the process:

Growing Sugar Beets

1-Soil and Planting: Sugar beets thrive in well-drained, fertile soil, ideally a sandy loam. They prefer a slightly acidic to slightly alkaline pH, between 6.0 and 8.0. Prepare the soil by tilling and removing debris like rocks and weeds. The ideal soil temperature for planting is around 60°F following the last frost for spring planting.

2-Sowing Seeds: Plant the seeds at a depth of about 1.5 inches, in rows spaced 18 inches apart. Initially, seeds can be sown 1 inch apart and then thinned to 4-5 inches apart once they’ve grown a few pairs of true leaves.

3-Care and Maintenance: Sugar beets require full sunlight and moderate watering to keep the soil consistently moist. They are hardy in temperate zones, usually zones 6-10. If temperatures drop below 40°F, add mulch for protection, or use partial shade if it gets too hot.

4-Harvesting: Sugar beets reach maturity in about 90-100 days. Harvest them by pulling them out of the ground and washing them thoroughly.

Making Your Own Sugar

Read More

Canned Pineapple

When life gives you a great deal on pineapples, why not make the most of it?

In this article, we’ll explore the art of maximizing the potential of this beautiful fruit by showcasing three creative and sustainable ways to utilize every part of it. We’ll start by canning the juicy flesh, then boil the skins to extract refreshing pineapple juice, and finally, transform the leftover skins into a flavorful powder for teas. Join us on this journey of culinary innovation where nothing goes to waste!

Recipe 1: Canned Pineapple

Ingredients:

  • Fresh pineapples
  • Water
  • Sugar (optional)

Instructions:

1. Start by preparing the pineapples. Remove the outer skin, crown, and the core.

2. Cut the pineapple flesh into desired shapes, such as rings or chunks.

3. Sterilize canning jars by washing them thoroughly with hot, soapy water and then placing them in a large pot of boiling water for 10 minutes. Remove and let them air dry.

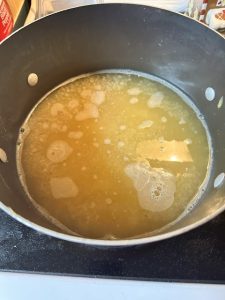
4. In a large pot, combine water and sugar (if desired) to create a light syrup. Use approximately 1 cup of sugar for every 4 cups of water.

5. Bring the syrup to a boil, stirring until the sugar dissolves completely.

6. Pack the pineapple pieces into the sterilized jars, leaving a little space at the top.

7. Pour the hot syrup over the pineapples, ensuring they are fully submerged.

8. Carefully remove any air bubbles by running a knife or spatula along the sides of the jars.

9. Wipe the jar rims clean and seal them tightly with sterilized lids and rings.

10. Process the jars in a boiling water bath for about 15 minutes.

11. Remove the jars from the water bath and let them cool to room temperature. You’ll hear a satisfying “pop” sound as the lids seal.

12. Store the canned pineapples in a cool, dark place and enjoy them in various recipes or as a sweet treat on their own.

Recipe 2: Pineapple Juice

Read More

NEVER LEAVE A CHARGER IN AN OUTLET WITHOUT YOUR PHONE

Many people often leave their chargers plugged into outlets even after their devices are fully charged. However, there are several risks associated with this habit that are not widely known.

Risks of Leaving Chargers Plugged In

1-Continuous Electricity Draw:

Chargers have components that draw a small amount of electricity even when not actively charging a device. This standby power consumption, while minimal, can add up over time.

2-Overheating:

Chargers that remain plugged in can overheat. This constant heat can lead to the deterioration of internal components like capacitors, shortening the lifespan of the charger.

3-Risk of Fire:

Read More

Revitalize Your Skin and Boost Immunity

Looking to rejuvenate your skin and enhance your immunity naturally? Try this daily elixir packed with ingredients known for their skin benefits and immune-boosting properties. Here’s how to make it:

Ingredients:

  • 1 lemon (approximately 3.5 ounces): Lemons are rich in vitamin C, which boosts collagen production, repairs damaged skin cells, and reduces fine lines. They also help detoxify the body, improve digestive health, and enhance immunity. The pectin found in lemons can aid in lowering cholesterol levels.
  • 2 oranges (approximately 7 ounces): Oranges, like lemons, are high in vitamin C. Drinking orange juice may help control signs of aging. Oranges also contain antioxidant compounds that combat free radicals and carotenoid compounds that promote healthy vision.
  • 0.35 ounces (10 grams) of ginger: Ginger can reduce inflammation, impact mitochondrial functioning, reduce redness, and help fade scars. It also plays a role in preserving skin collagen.
  • 0.035 ounces (1 gram or 1/2 teaspoon) of cinnamon: Cinnamon improves blood circulation and oxygenates the skin.
  • 6.76 fluid ounces (200 milliliters) of water: Use this to create the elixir.

Instructions:

Read More