Day: November 20, 2023

How to grow an apple tree from seeds at home

Here’s how to grow an apple tree from seeds alone – it’s really easy if you follow these steps. Below we explain how to do it.

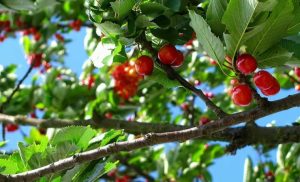
Who wouldn’t like to have  an apple tree  in their garden? Being able to eat fruit from your own garden is a real privilege. It may seem difficult, or even impossible, to plant an apple tree at home, but it is actually very simple. The important thing is to follow  each step precisely  and be patient. You don’t need to have a green thumb for this procedure, but those who enjoy gardening are undoubtedly at an advantage. Gardening is an activity full of facets, full of difficulties but also full of satisfaction.

Passion, love and patience are the keys to the success of your garden or vegetable garden. In addition to this, you also need a good dose of  botanical knowledge  and knowledge of all the secrets that can be useful. In the following article we explain how to plant and grow an apple tree:  only the seeds of the fruit are enough  . Let’s explore together and see how it’s done.

Planting an apple tree – a win-win choice

Lately, the number of people choosing to create  their own personal garden  has been on the rise. More and more people are deciding to plant the fruits and vegetables they like most directly in the garden. The reasons for this reversal of trend are multiple, but the main ones are two. The first is the desire to put  quality food on the table  , uncontaminated food and for which each product used in its culture is perfectly known. Confidence in large stores is gradually being lost, and there are still many doubts about the origin and quality of the products on sale.

To be sure, there are those who prefer to eat what they grow themselves. The second reason  is linked to an economic question. As we well know, we are facing a significant increase in prices, and fruits and vegetables are by no means exempt from these increases. These are significant expenses and difficult to bear, so being able to draw directly from your own garden  is a significant advantage  .

That said, let’s now discover together  all the steps to follow  to plant an apple tree in your garden. It will take very little.

Here’s how to plant it in the garden

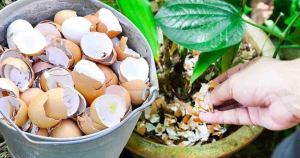
To be able to  plant the apple tree  in our garden we must start  from its fruit  : the apple. So the very first thing to do is to divide an apple into several parts and  remove all the black seeds  that are there. It is from these seeds that our tree will begin to grow. Let’s immerse them all in a bowl full of water and immediately throw away the ones that float: they are not good for planting. Seeds that float tend not to germinate.

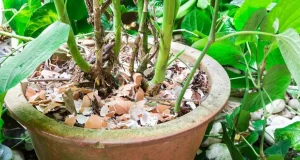
In a flowerpot we insert   good quality soil and place the chosen seed on the surface of the soil. Cover it with a little more soil and water thoroughly. At this point, as you can imagine, it will only be necessary to water when the soil dries out and wait. A shoot  will begin to emerge within fifteen days. After a month, the shoot will be much taller and more vigorous, and it will necessarily be necessary to carry out the transfer.

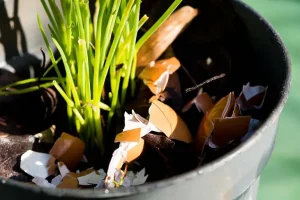
Each time the seedling begins to grow several centimeters,  the pot must be changed  to respect its dimensions. The roots will require more and more space and nutrients. If you can have this consistency, over time your seedling will begin to  grow into a tree  and give you spectacular fruit.

Read More

Creamy Homestyle White Delight Gravy

Indulge your taste buds with our delectable Creamy Homestyle White Delight Gravy – a culinary masterpiece that elevates the ordinary to extraordinary. Crafted from six pantry staples, this quick and easy recipe takes just ten minutes, offering a velvety texture and a burst of savory flavor. Ideal for pairing with biscuits, fried or baked chicken, pork chops, or potatoes, this versatile creation will become a kitchen favorite. Let’s dive into the simplicity and richness of this culinary delight!

Ingredients:

  • 1/4 cup unsalted butter (substitute with bacon fat for a smoky twist)
  • 1/4 cup all-purpose flour
  • 2–2 1/2 cups whole or 2% milk (adjust as needed, see notes)
  • 1–2 pinches of cayenne pepper
  • Salt and freshly ground black pepper to taste

Method:

  1. In a spacious skillet over medium-low heat, melt the butter (or bacon fat) until it shimmers.
  2. Add the flour and whisk continuously for about 3 minutes, allowing it to lightly brown.
  3. Slowly whisk in the milk until the mixture becomes smooth and creamy.
  4. Introduce cayenne pepper, salt, and black pepper while continuing to whisk.
  5. Cook the mixture, whisking frequently, until the gravy achieves your desired thickness.

Conclusion:

There you have it – a culinary journey completed in just 13 minutes, resulting in a heavenly Creamy Homestyle White Delight Gravy. The simplicity of this recipe, with its Southern charm, offers a rich and satisfying addition to your favorite dishes. Whether it’s a comforting breakfast with biscuits or a hearty dinner with chicken or pork chops, this white gravy effortlessly transforms the ordinary into the extraordinary. Enjoy the delightful convenience of making it in advance, savoring its flavor up to 4 days in the fridge or freezing for up to 3 months. Elevate your meals with this unique, original, and oh-so-easy white gravy recipe!

Read More

CALIFORNIA SPAGHETTI SALAD

“Discover the vibrant flavors of the Golden State with our delectable California Spaghetti Salad. Bursting with an array of fresh vegetables and a zesty Italian dressing, this salad is not only a treat for your taste buds but also a feast for your eyes. Join us on a culinary journey through the sunny flavors of California in this unique and original recipe.”

Ingredients:

  • 400-500 grams of spaghetti.
  • 1½ cups of cherry tomatoes, halved.
  • 1 cucumber, diced.
  • 2 zucchinis, cubed.
  • 1 green pepper, diced.
  • 1 red pepper, diced.
  • 1 red onion, diced.
  • A handful of sliced black olives, drained.

For the Dressing:

  • 1 bottle of Italian dressing.
  • ½ cup of grated Parmesan cheese.
  • 1 tablespoon of sesame seeds.
  • 1 teaspoon of paprika.
  • ¼ teaspoon of celery seeds.
  • ½ teaspoon of garlic powder.

Instructions:

  1. Begin by cooking the spaghetti according to the package instructions. Once cooked, drain and rinse it with cold water to stop the cooking process. Set it aside.
  2. In a large mixing bowl, combine the diced zucchinis, halved cherry tomatoes, diced green and red peppers, diced red onion, diced cucumber, and sliced black olives. This medley of colorful vegetables adds both flavor and visual appeal to our California-inspired salad.
  3. In another mixing bowl, prepare the dressing by whisking together the Italian dressing, grated Parmesan cheese, sesame seeds, paprika, celery seeds, and garlic powder. This dressing will infuse your salad with a burst of California sunshine.
  4. Now, it’s time to bring everything together. Toss the cooked spaghetti with the diced vegetables and black olives in the large mixing bowl. The combination of textures and flavors is what makes this salad truly special.
  5. Pour the prepared dressing over the pasta and vegetables, ensuring that every ingredient is coated with the delicious California-inspired flavors.

Conclusion:

“Chill the salad in the refrigerator, covered with plastic wrap, for at least three hours to allow all the flavors to meld together. The result? A California Spaghetti Salad that’s not only incredibly nutritious but also a delight for your taste buds and a feast for your eyes. Its colorful medley of fresh vegetables and zesty dressing make it a perfect addition to any meal. Whether you’re enjoying it as a side dish at a barbecue or as a standalone meal, this unique and original recipe is bound to be a crowd-pleaser. Give it a try and savor the sunny flavors of California in every bite!”

Read More

Add a spoonful to the water and water the peace lily. New leaves will appear quickly

Commonly known as spathiphyllum, the peace lily is one of the easiest plants to grow. Native to the humid forests of South America, the peace lily also grows in some tropical areas and thrives perfectly indoors, as long as it is well maintained. Here’s the trick that will make new leaves grow.

To live, most plants need water and light, and the peace lily is no exception to this rule. However, although it is considered an easy plant to grow, its maintenance requires special attention so that it can flourish in the best possible conditions. In this article, we give you the trick to stimulate its flowering.

How to maintain the peace lily?

It’s no secret that plants grow faster when properly cared for. This is the case of the peace lily which can grow extremely quickly and reach around 1 meter in height. Indoors, exposed to light or shade, spathiphyllum adapts and thrives, regardless of the season. However, adjusting shading and light will preserve its leaves from drying out while promoting its growth. Furthermore, it is between May and October that its flowering is most abundant. Here are some tips that will help you maintain it.

Read also: These plants that clean our interior

I repot every year

It is important to repot the spathiphyllum every year and more precisely in spring, before it matures. Once adult, it is sufficient to make a surface by replacing the upper layer of earth on more or less 4 cm. In spring, monthly addition of special fertilizing green plants will be a plus. You can also add drainage to the bottom of the pot when repotting. This will absorb excess irrigation water.

Observe the feuillage

Like other plants in tropical areas, the peace lily loves humidity. In the prolonged absence of watering, it may therefore happen that it withers. In this case, it is enough to water it so that its foliage straightens naturally. However, without water for several weeks the plant can wilt and dry out. In this case, it would be wise to place the pot in a tray filled with water for several hours to bring it back to life. And as any good gardener will advise you, you will need to regularly remove dead leaves.

Foliage spray

When its foliage is dry, the plant can attract insects and other pests, such as red spiders. In this case, do not hesitate to spray it regularly with water and dust it. This will contribute to the increase in humidity.

Water regularly

This tropical plant will flower quickly and properly if you remember to drain its soil well. The soil must remain fresh. It is therefore recommended to water it every day in summer and once a week in winter. However, to stimulate its flowering and strengthen its immunity, you will need to add gelatin to the irrigation water.

Read also: Orchids will bloom all year round if you water them with this natural product

Why water your Spathiphyllum with gelatin?

Gelatin is an essential ingredient in the production of homemade fertilizers because it provides plants with the excess nitrogen necessary for their development and growth. It is therefore a simple and economical product that will strengthen the immune system of the peace lily. Here’s how to use it in this case:

  • Heat the equivalent of a glass of water and add a spoonful of gelatine. The water should not be boiling;
  • Mix to mix everything well;
  • Once the solution has cooled, add three glasses of tap water;
  • Finally, water the plant with this solution once a month, especially in spring and summer.

Thanks to this trick, the peace lily will be more satisfied and will bloom profusely after a few days.

Read also: Why use rice as a natural fertilizer for flowering plants?

Read More

Baked Gourmet Chicken Cordon Bleu Extravaganza

Elevate your dining experience with our culinary masterpiece, the Baked Gourmet Chicken Cordon Bleu Extravaganza. This exceptional dish boasts Panko-crusted chicken breasts, generously filled with the harmonious duo of Swiss cheese and ham, all crowned with a luscious Parmesan-Dijon cream sauce. Balancing simplicity and sophistication, this recipe is not only perfect for a quick weeknight dinner but also makes a stunning centerpiece for your most elegant gatherings.

Ingredients:

  • 2 large boneless, skinless chicken breasts, halved lengthwise
  • Kosher salt and freshly ground black pepper
  • 2 eggs
  • 1 tablespoon milk
  • 1/2 cup all-purpose flour
  • 1 1/4 cups Panko bread crumbs
  • 1 teaspoon dried basil
  • 1 teaspoon dried oregano
  • 4 slices deli-sized baby Swiss cheese
  • 4 slices deli-style ham

Parmesan-Dijon Cream Sauce:

  • 2 tablespoons butter
  • 2 tablespoons flour
  • 1 1/2 cups milk
  • 1 1/2 tablespoons Dijon mustard
  • 1/2 cup shredded Parmesan cheese
  • 1 tablespoon fresh chopped Italian parsley (optional)

Instructions:

  1. Preheat the oven to 375 degrees. If needed, use a meat mallet to pound chicken breasts to a 1/2-inch thickness. Season with kosher salt and black pepper.
  2. Whisk eggs and 1 tablespoon of milk in a small bowl. Place flour on a shallow plate. Combine Panko bread crumbs, basil, and oregano on a separate shallow plate.
  3. Lay one piece of Swiss cheese on each chicken piece, topping it with a slice of ham. Roll up the chicken breasts, securing them with toothpicks.
  4. Dip each rolled chicken stack in the egg mixture, then in flour, back in the egg mixture, and finally in the Panko breadcrumbs.
  5. Place the prepared chicken on a baking sheet lined with parchment paper. Lightly spritz each piece with cooking spray. Bake for 25-35 minutes or until the internal temperature reaches 165 degrees. Cover loosely with aluminum foil.
  6. In the meantime, melt butter over medium heat. Whisk in flour and cook for 2-3 minutes, whisking constantly. Slowly whisk in milk and cook until slightly thickened (about 2 minutes). Reduce heat to low and whisk in Dijon mustard and Parmesan cheese. Cook until the cheese is melted, whisking constantly.
  7. Carefully remove toothpicks, slice the chicken into rounds, drizzle with the cheese sauce, and sprinkle with parsley if desired.

Conclusion:

Savor the symphony of flavors in each bite of this Baked Gourmet Chicken Cordon Bleu Extravaganza. Whether it’s a casual weeknight or a special celebration, let this dish be the star of your dining experience, bringing together simplicity, elegance, and culinary brilliance.

Read More

Why is it brilliant to place eggshells around plants?

The virtues of eggs on our body are well established. Rich in proteins, minerals (iron, zinc, selenium) and vitamins (A, D, E and B12), the egg is one of the most nutritious foods that exist. It is also one of the pillars of a healthy diet. But if its health capital has been amply proven, did you know that its shells are also very useful for plants?

In fact, very rich in calcium and nutrients, eggshells act as a natural fertilizer for plant growth. But not only. They are ideal for repelling certain pests such as slugs and other crawlers, preventing plant diseases and remaining very effective for composting. Plus, they’re biodegradable!

From now on, after breaking eggs to make an omelette, you will remember to save your shells and never throw them in the garbage again!

You still need to know all the secrets in order to use them wisely. Discover in this article all the little tips for taking care of your beautiful indoor and outdoor plants.

1 – Disinfestation

Are your plants often invaded by unwanted guests such as slugs and slugs? We have the solution for you ! Take an eggshell, crush it into small sharp pieces, and place the residue around the plant. Don’t bury them, just make a wreath around them. And there you have it, you have just installed a barrier against crawlers who will no longer dare to get close so as not to get injured.

2 – Soil without acidity

  • We know that plants need soil to grow healthily. But for optimal growth, the soil must always be favorable for them. The problem is that most soils are acidic, therefore not very beneficial for many plants that cannot tolerate this acidity. Once again, eggshells will save the day. In fact, they provide an important source of calcium, magnesium and phosphorus which balance the pH of the compost and fight the acidity of the soil.
  • To do this: Crush the husks into a powder and mix them with the soil surrounding your plants. When you water, they will release their properties and reduce the binding effect of acidity.

3 – An excellent fertilizer

As already mentioned, eggshell is an excellent fertilizer for plants, shrubs and flowers. This natural fertilizer will provide your plants with all the nutrients they need for their growth. Did you know, for example, that shells are highly recommended for growing tomatoes? They are known to prevent “apical necrosis”, the most common disease affecting tomatoes in our gardens.

Here are some tips for keeping your plants healthy:

  • Use the shells of 6 eggs and place them in a saucepan with 3 liters of water. Boil well. Then, once the water has cooled, you can use it on your plants.
  • Another method, a little more complex, but much faster and more efficient. Crush 12 eggshells using a rolling pin or wooden spoon. Place them in a container with a lid and set them aside. For at least 40 days, sprinkle one or two tablespoons of this powder on the soil, at the base of your plants. Calcium will be released gradually each day. This remedy works great for your houseplants too.

4 – A natural vase

  • You can also use your eggshells as a natural pot for seedlings. This way you will always have a high source of calcium for this growth phase: the fundamental basis for your plants to grow very healthily and with the necessary nutrients.
  • So consider recycling your eggshells into very ingenious containers to germinate the seeds of your plants and flowers. It’s easy and very eco-friendly!
  • Boil your egg, and once cooked, remove only the top part of the shell, leaving the largest part whole.
  • Let them sit in the same container you bought the eggs in and fill them with fertile soil and seeds.

5 – Fight the flea beetle

  • As we said above, eggshell is an excellent repellent for all types of small animals. The flea beetle is one of them.
  • This tiny insect is so small that you probably won’t detect it. However, small holes are often noticed on the leaves. Yes, he is really responsible!
  • To avoid this problem, crush eggshells into a powder and add them to the soil.
    You will definitely get rid of this insect!
  • As you may have understood, eggshells are a real mine of benefits in the world of gardening. And their use has become a real trend in recent years. Organic fertilizer, compostable waste, anti-crawl barrier, prevention against certain plant diseases… With all this, it’s no longer a question of getting rid of them!

Read More