Day: November 20, 2023

How to Brighten White Linen: 7 Helpful Suggestions

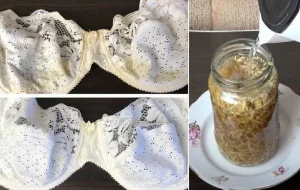
A garment, sheet or tablecloth that’s more yellow than white instantly loses all its charm, and you won’t enjoy wearing it anymore. Your prettiest blouse is turning more and more yellow and you’re sad about it – don’t panic! Thanks to a few tricks, you’ll be able to restore its radiance and wear it again with pleasure.

1 – LEMON

Known for its whitening properties, lemon is a citrus fruit of choice for your laundry. For this System D preparation, you’ll need 2 grams of salt and the juice of 2 lemons. You can also replace the salt with bicarbonate of soda, also renowned for its ability to whiten fabrics. Mix all these ingredients in lukewarm water and place in a basin for an express hand-wash. Lemon is a natural household product. You’d be wrong to deprive yourself of it!

2 – SUDDEN BICARBONATE 

Biodegradable, practical and non-toxic, it’s the ultimate household product. In laundry, baking soda is a cleaning agent that removes dirt and yellowish stains caused by perspiration or dampness.

This gentle abrasive restores the shine to white linens. For machine washing, pour two cups of baking soda into the drum. For hand washing, add half a cup of baking soda to the water and soak the yellowed laundry. It’s a good idea to sprinkle the product directly onto the stains, then rub.

3 – SODA CRYSTALS

  1. Soak the garment or linen for 1/4 in a solution of one teacup of soda crystals to one liter of hot water.
  2. Scrub stains.
  3. Leave for a few minutes, then rinse.

4 – POWDERED MILK

To give your clothes a second life, there’s nothing like a little dehydrated milk. Mix it with water and soak your clothes in it. For even more impressive results, dry your clothes in the sun. This tip is also valid for classic milk, provided you soak it for an hour in the drink.

5 – HYDROGEN PEROXIDE

It’s a well-known fact that you can do a lot with hydrogen peroxide. Using a cloth soaked in hydrogen peroxide, rub the stain. Rinse, wash as normal in your washing machine and you’re done. Effective, isn’t it? Your little white dress is as good as new again!

6 – SAVON DE MARSEILLE 

Marseille soap is known for its many virtues. Not only can it whiten your favorite white pants but it can also fight yellow and gray stains. All you need to do is soap your clothes, leave them in warm soapy water for an hour, then rinse and leave to dry. Simple, isn’t it?

7 – WHITE VINEGAR

Known the world over for its many uses in home care, white vinegar is also a great ally for softening and staining yellowed clothes.

Its acidic compounds easily penetrate fabrics, removing color-affecting compounds.

What’s more, it’s just as effective as chemical fabric softeners, which can be highly toxic, leaving your clothes feeling pleasantly soft.

Ingredients

  • ½ cup white vinegar (125 ml)
  • ¼ cup detergent (62 ml)

Preparation

  1. Mix white vinegar with your usual detergent and place in the detergent dispenser of your washing machine.
  2. If your clothes are really damaged, you can immerse them in a basin containing vinegar and water.

Read More

EASY CABBAGE SOUP

HOW TO MAKE EASY CABBAGE SOUP

Cabbage soup is a comforting, nutritious, and budget-friendly dish that’s incredibly easy to prepare. Whether you’re looking for a hearty meal on a chilly day or a healthy option for a light lunch, this easy cabbage soup recipe is the answer. Loaded with vegetables and bursting with flavor, it’s a versatile dish that can be customized to your taste.

The star of this soup is undoubtedly the cabbage, which adds a mild sweetness and a satisfying crunch. Carrots and celery provide a burst of color and a pleasant earthy undertone, while onions and garlic infuse a rich depth of flavor. A can of diced tomatoes adds a touch of acidity and brightness to the broth, tying everything together.

This soup’s beauty lies not only in its simplicity but also in its adaptability. Feel free to customize it with your favorite herbs, spices, or even a dash of hot sauce for a little kick. Whether you enjoy it as a light lunch, a comforting dinner, or a nutritious side dish, this easy cabbage soup is sure to become a household favorite. It’s a reminder that great food doesn’t need to be complicated; sometimes, the simplest recipes are the most delightful.

Follow along to learn how to make this satisfying soup.

HERE IS THE LIST OF THE INGREDIENTS YOU’LL NEED:

  •  1 small shredded head of cabbage.
  • 2 peeled and sliced carrots.
  • 2 celery stalks, chopped.
  •  One diced onion.
  • 3 garlic cloves, minced.
  • 1 Can.Of (14.5 oz) diced tomatoes.
  • 8 Cups.Of vegetable or chicken broth.
  • 1 Tsp.Of dried thyme.
  • 1 Tsp.Of dried oregano.
  • Salt and black pepper to taste.
  • 2 Tbsp.Of olive oil.
  • Fresh parsley for garnish (optional).

DIRECTIONS:

1st Step

Melt the olive oil in a large soup pot over medium heat. Add the chopped celery, diced carrots, minced garlic, and diced onion. Sauté the veggies for approximately 5 minutes, or until they begin to soften.

2nd Step

Add the minced dry thyme, dried oregano, and cabbage. Cook the cabbage for a further five minutes, letting it slightly wilt.

3rd Step

Place the chopped tomatoes in the saucepan together with their juice, then add the vegetable or chicken broth. To thoroughly incorporate all the ingredients, stir well.

4th Step

Bring the soup to a boil before lowering the heat. For approximately 20 to 25 minutes, or until the veggies are soft, cover the saucepan and boil it.

5th Step

To taste, season the cabbage soup with salt and black pepper. As necessary, adjust the seasoning. Pour the heated soup into bowls and, if preferred, top with fresh parsley.

Read More

PISTACHIO PINEAPPLE CAKE: A Delectable Fusion of Flavors

PISTACHIO PINEAPPLE CAKE: A Delectable Fusion of Flavors

The Pistachio Pineapple Cake is a delicious combination of the savory taste of pistachios with the sweet flavor of pineapple. The deep, earthy flavor of pistachios is combined with the refreshing taste of juicy pineapple in this one-of-a-kind cake recipe, resulting in a cake that is both tasty and moist and is certain to capture your taste buds. When brought together, these two diverse components provide a harmonic balance that is suitable for every event, from everyday get-togethers to momentous occasions such as weddings and anniversaries.

A unique culinary masterpiece, the Pistachio Pineapple Cake brings together the distinctly delicious tastes of pistachios and pineapple to produce a sweet treat that manages to be both elegant and homey at the same time. This cake is likely to create a long-lasting imprint on your taste, whether it is had with a cup of coffee or as a sweet conclusion to a dinner commemorating a special occasion.

THE INGREDIENTS LIST:

2 Cups.Of shelled pistachios.

2 Cups.Of all-purpose flour.

1 1/2 Tsp.Of baking powder.

1/2 Tsp.Of baking soda.

1/2 Tsp.Of salt.

1 Cup.Of unsalted butter, softened.

2 Cups.Of granulated sugar.

4 large eggs.

1 Tsp.Of vanilla extract.

1 Cup.Of buttermilk.

1 Cup.Of crushed pineapple, drained.

1/2 Cup.Of shredded coconut (optional, for garnish).

PREPARATION:

1st Step

To begin, preheat the oven to 175°C (350°F). Roast the pistachios in their shells for 8 to 10 minutes, or until aromatic, on a baking sheet. After allowing them to settle, pulse them into a fine mill in a food processor. Aside; set aside.

2nd Step

Whisk together the all-purpose flour, baking powder, baking soda, and salt in a medium basin. Thus, a uniform distribution of leavening agents is achieved, resulting in a cake with a consistent texture.

3rd Step 

Cream the softened butter and granulated sugar in a large mixing basin until light and airy. This can be accomplished in three to five minutes using an electric mixer set to medium speed.

4th Step 

As they are added, pulse the mixture vigorously after each egg. Ensure that the vanilla extract is thoroughly combined and the batter is homogeneous.

5th Step 

Gradually incorporate the dry ingredients while alternating with the buttermilk into the liquid ingredients. Mix the dry ingredients in at the beginning and end, just until combined. It is important to prevent excessive combining to preserve the light and delicate texture of the cake.

6th Step 

Fold the drained, pulverized pineapple and the finely ground pistachios into the mixture in a gentle motion. Pistachios will contribute a delicate nuttiness to the dish, whereas pineapple will impart flavor and hydration.

7th Step 

Pour the batter into a cake tin that has been greased and floured. Bake for 30 to 35 minutes, or until a toothpick inserted into the center emerges clear from the pan. By the dimensions of the cake pan and the oven, modify the baking time.

8th Step 

For an additional flavor and texture boost, sprinkle grated coconut on top of the cake before baking, if desired. Ten minutes after removing the cake from the pan, transfer it to a wire rack to chill completely. After the dessert has chilled, proceed to slice and serve, delecting the harmonious fusion of pistachios and pineapple with each mouthful.

Read More

CHICKEN ALFREDO LASAGNA

HOW TO MAKE CHICKEN ALFREDO LASAGNA

The Chicken Alfredo Lasagna that mom used to cook for our family get-togethers is a meal that will never go out of style and is very soothing. It has a unique and irreplaceable place in our hearts. This time-honored recipe creates a dish that encapsulates the coziness and affection that are inherent in homemade meals via the artful layering of succulent chicken, decadent Alfredo sauce, and perfectly cooked lasagna noodles. When we smelled the tantalizing scent wafting through the air of the kitchen, we knew that the meal that awaited us at the table with our loved ones would be both delectable and comforting.

In addition to being a delicious dish, Mom’s Chicken Alfredo Lasagna will take you back in time to happier times spent with loved ones around the dinner table. This time-honored meal, with its tiers of rich Alfredo richness and layers of flavorful chicken, continues to be a symbol of love and togetherness, giving the coziness of home to every taste.

THE INGREDIENTS YOU’LL NEED:

  • 1 Lb.Of lasagna noodles, cooked al dente.
  • 2 Cups.Of cooked and shredded chicken.
  • 3 Cups.Of Alfredo sauce (homemade or store-bought).
  • 2 Cups.Of ricotta cheese.
  • 1 Cup.Of grated Parmesan cheese.
  • 3 Cups.Of shredded mozzarella cheese.
  • 1/2 Cup.Of chopped fresh parsley (for garnish).
  • Salt and pepper to taste.

PREPARATION:

1st Step 
Cook the chicken until it reaches an internal temperature of 165 degrees and season it with salt and pepper to taste. Shred the chicken into pieces that are easily digestible, then put it aside.
2nd Step 
In a saucepan set over medium heat, combine butter, heavy cream, and grated Parmesan cheese to make a velvety Alfredo sauce. Never stop stirring until the cheese has completely melted and the sauce has become completely smooth. Salt and pepper may be added to taste as a seasoning.
3rd Step 
Spread a thin layer of Alfredo sauce on the bottom of a baking dish that has been buttered. On top of the sauce, arrange a layer of lasagna noodles that have been cooked. After that, add a layer of shredded chicken, then top it with a few dollops of ricotta cheese and a liberal sprinkling of mozzarella. Continue doing this until you have lovely layers of pasta, chicken, and cheese.
4th Step 
Spread a lot of mozzarella and Parmesan cheese over the top of the lasagna for the final layer. This results in a topping that is golden brown and sticky, which contributes to the richness of the lasagna.
5th Step 
Bake for 25 to 30 minutes at 375 degrees Fahrenheit (190 degrees Celsius) with the baking dish covered in aluminum foil in an oven that has been preheated. Remove the lid and continue baking for an additional 10–15 minutes, or until the cheese is golden brown and bubbling.
6th Step 
After removing the lasagna from the oven, give it a rest for ten minutes. Add a splash of color and a burst of freshness to the dish by sprinkling chopped fresh parsley on top.
7th Step 
Using a sharp knife, carefully cut the lasagna into squares to expose the layered beauty hidden beneath. Serve while still warm, and then watch as your family and visitors are delighted by the layers of noodles steeped in Alfredo sauce, succulent chicken, and gooey cheeses.

Read More

Aster, a flower whose name has uncertain origins

The Aster plant genus contains around 500 species of plants divided into herbaceous, deciduous and perennials. Each plant of the Aster genus differs based on the class to which it belongs and therefore starting from the appearance of each specimen. This plant loves rocky soil and grows very well along garden borders or flowerbeds.

Aster, the plant with an ancient and particular meaning

The flower produced is similar to that of daisies but can come in different colors. Among the various existing species we find for example the Aster Alpinus , with a height of around 15-20 cm characterized by a diameter of 35/40 cm. The leaves are spatulate and have a light fuzz on the surface, they are lanceolate in shape. The flowers produced by this particular species are purple, pink or white in color and the center wears shades of orange and yellow. The Aster Alpinus plant. There is another species of Aster called Aster novi-belgii which is a perennial herbaceous plant with a bushy habit. This plant can reach 90 cm in height and one meter in width.

There are more than 500 Aster species: here are the characteristics

Also in this case the plant has lanceolate and pointed leaves. The flowers it produces are equipped with numerous pink or lilac but also white petals. The center of the corolla is yellow. This species is also commonly called “September flower” due to its flowering period which starts at the end of summer and lasts until the end of October. Together with the novi belgii, the novae angliae are also included among the septembrini. Always considering the flowering period, the flowers of the Aster dumosus, with a shrubby and groundcover habit, capable of reaching 40-50 cm in height, also bloom by September.

How to grow Aster? Let’s start with the type of terrain

Aster dumosus bushes are green and round, they also have very smooth green leaves. This species produces many small flowers with white or blue petals with a yellow center. This plant prefers light and nutritious soils, i.e. rich in minerals. When planting, incorporate some compost or organic substance into the soil. Be careful of waterlogging: Aster requires extremely draining soil.

Environment

The aster loves the sun, bright shade but a sunny environment will be perfect for its growth. Provide the plant with a guardian, especially if it is still young: in this way it will be able to resist bad weather such as wind and heavy rain.

Watering

The plant needs constant water in the summer and spring seasons. Don’t overdo it though, the above rule applies: the aster so always make sure the soil is moist and not soaked before watering again.

Flowering

Water the plant even when it has not yet produced flowers. To make the Aster capable of producing a grandiose flowering you will have to know that it is important to trim it from theuntil the beginning of July. This operation will lead to the formation of numerous buds. Remember to remove the flowers that gradually wither, this will allow the plant to produce new ones.

The name of the plant: why is it called that?

The name of the plant comes from the Greek in which the word aster (lit. “astro”) takes on the figurative meaning of ” star-shaped flower “. The first evidence of this denomination dates back to Linnaeus who introduced the botanical characteristics in 1735. However, the flower was already known before and was considered a symbol of inspiration for fantasies and ideas beyond the ordinary.

Read More

Traditional Pea Salad

Traditional Pea Salad

Ingredients:

  • 1/2 cup sour cream
  • 1/2 cup mayonnaise
  • 1 tablespoon granulated sugar
  • 1 tablespoon apple cider vinegar
  • 1/2 teaspoon salt, plus additional to taste
  • 4 cups frozen peas, thawed
  • 8 slices bacon, cooked and crumbled
  • 1/2 medium red onion, finely diced
  • 1 1/2 cups cheddar cheese, cut into small cubes

Instructions:

  • In a large bowl, combine sour cream, mayo, sugar, apple cider vinegar, and salt, whisking until well blended.
  • Add peas, crumbled bacon, diced onion, and cheddar cheese to the bowl. Gently stir to ensure even coating in the dressing.
  • Refrigerate for a minimum of 1 hour before serving to allow flavors to meld. Optionally, garnish with additional crispy bacon before serving. Enjoy!

Read More

Keto Egg Cups

Keto Egg Cups

Ingredients

16 eggs 8 slices deli sliced ham
1/2 cup shredded cheddar cheese

INSTRUCTION:

Preheat
Preheat oven to 400 degrees and spray muffin tins with cooking spray.
Add the ham
Cut each slice of deli ham in half to create 16 ham slices and lay each half into the cavities of the
muffin pans.
Add the cheese
Evenly sprinkle shredded cheese on top of each slice of deli ham.
Add the eggs
Crack an egg into each cavity. Sprinkle with salt and pepper.
Bake it
Bake at 400 degrees for 10 to 12 minutes or until egg is set.

NUTRITION

FACTS
Serving Size:
1 Egg Cup
16
SERVINGS
114
CALORIES
6.6g
FAT
11.9g
PROTEIN
1.1g
NET
CARB
1.1g
TOTAL
CARBS

Read More

GARLIC PARMESAN MUSHROOMS

Creamy garlic parmesan mushrooms are a super easy, flavorful dish that is packed with great taste and texture. Whole white mushrooms meld perfectly with butter, garlic, spices, cream, and grated parmesan cheese for an exceptional recipe you’ll crave. It makes for a wonderful side dish or appetizer.

Ingredients

  • 2 tablespoons butter
  • 1 tablespoon olive oil
  • 8 cloves of garlic, minced
  • 8 oz whole baby bella mushrooms
  • ⅓ cup heavy cream
  • 2 tablespoons cream cheese, softened
  • ⅓ cup fresh grated parmesan cheese
  • ¼ teaspoon onion powder
  • ¾ teaspoon dried oregano
  • salt and pepper, to taste
  • fresh parsley, to garnish

    Instructions

    1. Rinse and clean the mushrooms and pat dry
    2. melt butter and olive oil in a skillet over medium heat
    3. Add mushrooms and cook until browned, around 5 – 7 minutes
    4. Add garlic, cream, cream cheese, parmesan, onion powder, and oregano and cook for 5 – 10 minutes, until sauce is thick and creamy
    5. Salt and pepper to taste
    6. Garnish with fresh parsley and serve

Read More

Saving the olive trees: the initiative with which you can adopt them

A very interesting project is born to enhance the Apulian territory and to safeguard the very symbol of the region, the olive tree , affected by diseases. A start-up aims to reforest the area by planting new plants, thus helping small companies in the region to grow olive trees and produce extra virgin olive oil.

Olive trees are the symbol of Puglia and southern Italy itself, a local excellence that makes Italian olive oil one of the best products in the world. Here, olive harvesting is an ancient tradition. Unfortunately, for years the trees have been ravaged by the epidemic of Xylella Fastidiosa , a bacterial pathogen that is killing all olive trees.

The start up for the protection of Apulian olive trees: the initiative

The emergency is great and fewer and fewer olive trees are found in the region, especially healthy ones. A condition that has serious repercussions on the environment , but also on the Italian oil market. Obviously, it is the small producers who pay the costs . To help small businesses, two young entrepreneurs have created a very interesting start-up.

Adopt Me Italy was created to help Apulian farmers and to protect olive trees. It is a start up that allows you to adopt an olive tree . Just connect to the Adopt Me Italy portal and select the type of olive tree you want to safeguard. For each adoption you receive a certain quantity of oil, as well as the opportunity to visit the company that produces it.

Each person who adopts an olive tree will receive information on the adopted plant, growth, maturation, fruiting, pruning and harvesting, up to the production of the oil . A truly precious project that intends to protect an all-Italian treasure, admired throughout the world.

In this way, small companies will be able to reforest the areas , continuing to produce oil and survive. Each adoption uses an official certificate . In short, a wonderful initiative that allows us to lend a hand to small Italian farmers, who have been in difficulty for years due to the bacterium transmitted by parasites and which causes serious alterations in the affected plant.

Read More

SWEET ONION CASSEROLE

This Sweet Onion Casserole recipe is a wonderful combination of sweet onions, Swiss cheese, and rice. It makes a tasty side dish for any meal, from grilled meats to roasted poultry. A favorite in our home, you’ll get rave reviews every time you serve it.

Ingredients

¾ cup uncooked basmati rice
5 cups water
¼ cup butter
3 pounds sweet onions, coarsely chopped
1 cup half-and-half cream
1 ½ teaspoons salt
2 cups shredded Swiss cheese, divided

How To Make Sweet Onion Casserole

  • Preheat the oven to 350 degrees F (175 degrees C). Butter a 2-quart baking dish.
  • Bring water to a boil in a large saucepan, and sprinkle in rice. Stir, reduce heat to low, and simmer rice until it is half-cooked about 5 minutes. Drain rice, and set aside.
  • Melt butter in a large skillet over medium heat, and cook and stir onions until translucent but not browned, about 8 minutes. Mix cooked onions and butter in the skillet with rice; stir in half-and-half, salt, and 1 3/4 cup of Swiss cheese. Transfer mixture to the prepared baking dish, and sprinkle remaining 1/4 cup Swiss cheese over top.
  • Bake uncovered in the preheated oven until rice is tender and top is lightly browned, about 1 hour.

Read More