Day: November 15, 2023

The most powerful insecticide against mosquitoes is in the kitchen: you make them disappear for free

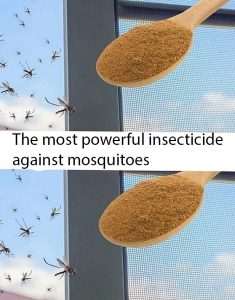
You can get rid of mosquitoes without spending money by using a powerful insecticide found in the kitchen that, unlike commercial insecticide sprays, requires only two ingredients.

Spring is coming and with it, the arrival of mosquitoes. As temperatures rise, these annoying insects resume their activity and can become a real problem for many people. It is important to take preventive measures, such as eliminating places where water accumulates and using repellents, to avoid bites and the diseases they transmit.

Insects, role in the ecosystem
Insects are a class of animals that represent the largest group of animals on earth. Due to their abundance, insects come into contact with humans in a variety of ways, both positive and negative.

Mosquitoes are one of the insects that most often come into contact with humans. These insects are annoying because they can bite and suck blood for food. Besides annoying bites, mosquitoes can also pose a danger to human health, as they can transmit diseases such as malaria, dengue fever, and West Nile virus.

Mosquitoes

Another insect that can be bothersome is flies, particularly fruit flies, which can enter the home and lay their eggs on food. This can lead to contamination and the proliferation of bacteria and other microorganisms that can cause health problems.

Bedbugs are another insect that can cause many problems, especially in the home environment. These insects feed on human blood and can cause itchy and irritated skin. The presence of bed bugs in a home can be difficult to eliminate and often requires professional intervention.

Read More

Shrimp and Cream Cheese Quiche

Discover how easy it is to make this delicious Shrimp and Cream Cheese Quiche recipe. I will show you step by step and all the ingredients needed. I guarantee you will put it among your favorites, you can’t go wrong, just follow the preparation steps below and everything will be fine. There won’t be a crumb left once it’s on the table, it’s love at first bite. If you want to add your own touch to make it even tastier, share what you made in the comments so everyone can try too.

Ingredients :

  • Dough :
  • 3 cups of wheat flour
  • 4 tablespoons of milk
  • 150 g of margarine
  • 1 teaspoon of salt
  • Trim :
  • 400 g canned button mushrooms, cut in half
  • 500 g large peeled shrimp
  • 2 cups sliced ​​leek onions (white part only)
  • 1 tablespoon of butter
  • 1 tablespoon chopped parsley
  • ½ cup chopped onion
  • 3 tablespoons of olive oil
  • Salt and pepper to taste
  • Trim :
  • 3 beaten eggs
  • 200 g fresh cream
    • 50 g coarse grated Gruyere cheese
    • 200 g cream cheese
    • 1 pinch of nutmeg

    Preparation of the Shrimp and Cream Cheese Quiche:

    Dough :

    1. First, mix the flour with the salt in a bowl. Next, make a well in the center and add the margarine.
    2. Mix gently with your fingertips until you obtain a crumb texture.
    3. Then add the milk, a spoonful at a time, mixing well until you have a smooth paste.
    4. Refrigerate for 30 minutes.
    5. Once removed from the refrigerator, roll out the dough and line the bottom and sides of a quiche mold (20 cm in diameter) or a round dish previously greased and floured.
    6. Then bake in a preheated oven at 180°C for 15 minutes.
    7. Remove from the oven and let cool.

    Trim :

    1. In a large non-stick pan, melt the butter and add the leek onions.
    2. Season with salt and pepper and fry until tender.
    3. Remove from the pan and set aside.
    4. In the same pan, heat the olive oil and make

Read More

Creamed Chipped Beef on Toast

  1. Do you have any recipes from your childhood that you still crave? Chipped beef on toast is one of those recipes for me. I know it’s not fancy nor is it good for me but I still absolutely love it.
  2. Do you have any recipes from your childhood that you still crave? Chipped beef on toast is one of those recipes for me. I know it’s not fancy nor is it good for me but I still absolutely love it. My mom and dad made it for us often while we were growing up and it has always been one of my very favorite breakfasts. Since it’s not good for any of us, I only make this recipe once a year, usually for my birthday.

Ingredients

  • 1 jar of dried beef slices rinsed well & chopped
  • 4 tbsp butter
  • 4 tbsp flour
  • Pinch of cayenne
  • 2 cups milk
  • Sea salt and freshly cracked pepper to taste
  • Bread toasted

How To Make Creamed Chipped Beef on Toast

  1. Rinse the slices of dried beef really well – they are VERY salty! Once you have rinsed well, pat dry with a paper towel.
  2. Chop the beef into small bite-sized pieces. Set aside.
  3. Heat the butter in the large saucepan over medium heat.
  4. Add the flour and pinch of cayenne pepper to the melted butter and whisk until well combined and cooked through, about 45 seconds.
  5. Very slowly add the milk while whisking continually.
  6. Once the milk has all been added, add the chopped dried beef.
  7. Cook, stirring occasionally, for a few minutes until thickened.
  8. Taste and season with sea salt and freshly cracked pepper, to taste, if needed.
  9. Serve on top of dry toast immediately. Enjoy

Read More

Soft, clean laundry with a drop of this: it will look like it just came from the laundry.

Everyone has that one item of clothing in their closet that they cherish, whether it’s a soft sweater, a favorite pair of jeans, or that dress which fits just right. The feeling of slipping into freshly laundered clothes, their fabric soft against your skin and emanating a gentle, inviting fragrance, is universally loved. But achieving that perfect laundry finish isn’t always easy. Luckily, we have a secret weapon up our sleeves: just a drop of magic!

Understanding Laundry Challenges

In our busy lives, laundry can sometimes feel like a never-ending chore. We’ve all faced stubborn stains that refuse to go away, or the frustration of clothes that lose their brightness and softness after a few washes. Plus, there’s the added concern of maintaining the integrity of delicate fabrics and ensuring they last a long time.

The Magic Drop: What Is It?

The magic drop isn’t a literal drop of a magical potion, but it signifies the importance of the right ingredient or product. Be it a specialized detergent, a fabric softener, or a unique blend of essential oils, this drop ensures that every piece of clothing comes out looking and feeling its best. The right product can tackle stains, preserve colors, and even impart a lasting fragrance to your clothes.

Benefits of the Magic Drop

Enhanced Softness: Clothes feel softer to the touch, making them more comfortable to wear.

Vibrant Colors: Retain the brightness and color integrity of your outfits, making them look brand new every time.

Long-lasting Fragrance: Your clothes will carry a fresh scent, which can elevate your mood and confidence throughout the day.

Protection: Delicate fabrics are protected against wear and tear, ensuring they maintain their structure and feel.

Choosing Your Magic Drop

Everyone’s laundry needs are different, based on the types of clothes they wear, the local water quality, and personal preferences. It’s essential to experiment and find out what works best for you. Look for specialized detergents or additives for specific needs like brightening colors, protecting darks, or catering to sensitive skin.

In Conclusion

The pursuit of perfect laundry is something we all share, and the secret might just be simpler than we think. It’s all about finding that ‘magic drop’ that caters to your specific needs. Once you discover it, every laundry day will be a day to look forward to, ensuring you always have that soft, clean, fresh-from-the-dryer feel whenever you dress.

Read More

Sweet potato recipe

HomeSweet potato recipe
Sweet potato recipe

It’s that point of yr whilst the air receives crisp, and we begin yearning all of the tastes of fall: cinnamon, maple, nuts, and of course, candy potatoes. So let’s bring them together! We have the perfect dish to do just that, too: Hasselback Maple Pecan Sweet Potatoes.

The Hasselback method is one of our favorites – remember the Hasselback Smoked Potatoes, Hasselback Chicken, and Easy Baked Hasselback Apples?! – This is the perfect way to get all that flavor infused with delicious orange potatoes.

Plus, the slicing and baking method gives the sweet potato an amazing combination of creamy and crunchy, which is the epitome of a fall food. We can’t praise this enough, so let’s stop talking and start cooking! Watch us make it, then read on for the recipe.

*Ingredients:

°2 medium sized sweet potatoes
°1 tablespoon vegetable oil
°Salt and black pepper to taste
°2 tablespoons of melted butter
°1 teaspoon ground cinnamon
°Half a cup of chopped American walnuts
°A quarter cup of maple syrup
°Half a teaspoon of pure vanilla extract
°1/2 teaspoon kosher salt

*Directions:

Preheat oven to 425 degrees F . It’s about (218 degrees Celsius).
Place a sweet potato between chopsticks to stabilize and guide the knife. Every half inch along the sweet potato, cut in all the way, or until the knife hits the chopsticks. (The chopsticks will help prevent the knife from slicing through the sweet potato.) Repeat with the two-dish potatoes.

Brush the potatoes with vegetable oil. Place in a small baking dish and season with salt and pepper to taste.

Bake the sweet potatoes for 30 to 40 minutes, or until tender.
Remove the sweet potatoes from the oven and increase the oven temperature to 230°C.

In a small bowl, mix together the melted butter, ground cinnamon, chopped walnuts, maple syrup, vanilla extract, and kosher salt. Stir to mix.
Pour the maple syrup mixture over and between the baked sweet potato slices, pushing the pecan pieces between each slice.

Return the stuffed sweet potatoes to the oven and bake an additional 8 to 10 minutes.
Remove the baked sweet potato from the oven and spoon any cooking liquid over it. Let them cool down a bit before serving.

How perfect are these sweet potatoes for fall? Not only are root vegetables about to be in season, but they also pair well with just about every dish we’ve begun to crave this time of year—and in turn, these maple pecan butter pairs perfectly with it.

Enjoy !

Read More

Boil the Bananas and Drink the Liquid Before Going to Bed, You Will Be Surprised with Your Sleep!

Using just a few items that are probably already in your kitchen, you can whip up a banana tea in no time! This organic banana infused sleep remedy works wonderfully and tastes so good. How it works ? Bananas, especially the peels, are loaded with potassium and magnesium. Although magnesium helps prevent sleep disorders, both magnesium and potassium work together to help relax muscles. In fact, magnesium is one of the best minerals for relaxation! Keep in mind, this recipe calls for 100% organic bananas.

For guaranteed relaxation, our team offers you a recipe for banana tea, to drink before sleeping to obtain the pleasure identical to that of a good massage.

Ingredients

  • An organic banana
  • 1 small saucepan of water
  • Cinnamon

Instructions

  1. Take the banana, cut both sides and put it in water and let it boil for 10 minutes. And then, in a cup, pour a little water and sprinkle a teaspoon of cinnamon into this delicious banana tea.
  2. It is recommended to drink this tea one hour before going to bed. You will be impeccably relaxed as if you had had a relaxing massage and you will wake up feeling very good in the morning.

Read More

Place three bay leaves under the bed

Bay leaves, while often recognized for their culinary use, also boast an ancient history in home remedies and cultural practices. One enchanting ritual involves placing bay leaves beneath one’s bed. Here’s a dive into the allure behind this tradition.

Serenity Inducer:

Bay leaves release a soothing aroma known to temper stress, ease anxiety, and pave the way for a restful slumber. If you find nighttime unsettling or sleep elusive, this might be a natural remedy to consider.

2-Aromatic Healing:

Akin to aromatherapy, which harnesses fragrances for holistic wellness, bay leaves too wield a therapeutic scent. Breathing in its fragrance can still the mind and deepen relaxation.

3-Respite from Daily Grind

The pressures of daily life weigh heavy on many. Slipping bay leaves under your resting place might just provide a tranquil escape from the hustle, setting a peaceful bedroom aura.

4-Echoes of Tradition:

For generations, in numerous cultures, bay leaves were reputed protectors, believed to repel negative energies and night terrors. Such beliefs imply more restful, uninterrupted sleep.

Harbingers of Positivity:

There’s a notion that bay leaves channel positive vibes into one’s sleep space. Such positivity might be conducive to restorative rest.

Guide to Bay Leaf Placement:

Read More

Say Goodbye To Fruit Flies And Gnats For Good – The Paper Towel Trick Changes Everything

When the temperatures rise, it’s not just the sun that makes its grand appearance. Enter the tiny culprits: fruit flies and gnats. These little invaders, with fruit flies being drawn to the freshness of fruits and vegetables and gnats having an affinity for indoor plants and damp terrains, aren’t merely irritants in our living spaces. They can also drastically cut short the lifespan of our food and plants.

The sheer speed at which they breed and colonize can be both surprising and maddening. And it’s no wonder that in such moments of frustration, many dash to the nearest store, eager to grab the first insecticide they lay eyes on. A quick solution, yes, but how many of us pause to think about the potential harmful chemicals we’re introducing into our homes?

However, there’s good news for those seeking safer alternatives! The wonders of household items come to the rescue, providing not only effective but also eco-friendly solutions. With just a few simple ingredients, you can craft traps so cunning, these pests won’t know what hit them.

These DIY methods are not only efficient but also ensure a chemical-free environment for you and your loved ones. So, the next time you spot these winged annoyances, remember: nature often has the best answers, right within our reach!

You will have the choice between:

Continue reading this article on the next page

Read More

Ribeye steak

Ribeye steak

Ingredients:

1 rib steak

Sea salt flakes

Freshly ground black pepper

50g butter

2 sprigs of thyme

1 clove of crushed garlic with its skin

Instructions:

Take the steak out of the refrigerator at least half an hour before cooking it until it reaches room temperature. This is an important step in ensuring that the steaks are cooked evenly.

When ready to cook, generously season the steak. Sprinkle with lots of salt and pepper on both sides, and set on top to get even coverage.

Heat a frying pan. If you are cooking two slices of steak, make sure the pan is large enough to fit the slices comfortably. Otherwise, use two pans and heat them simultaneously. Add the steak to the skillet and cook over medium-high heat for 2 to 3 minutes on each side (depending on the desired thickness and degree). As a guideline, a 3cm steak should be cooked after 5 minutes. If you have a meat thermometer, the indoor temperature should be 50 ° C for rarity, 60 ° C for average, and 70 ° C for good cooking.

Don’t Lose

Read More

Nighttime Salt Trick for Your Broom: Prepare to Be Amazed

steps to revive and extend the life of your broom using vinegar, salt, and hot water:

Materials Needed:

  • Broom
  • Hot water
  • Distilled white vinegar
  • Salt
  • Bucket or bathtub

Instructions:

  1. Fill a bucket or your bathtub with hot water. The water should be hot enough to help dissolve the salt and vinegar effectively.
  2. Add approximately 1 cup of distilled white vinegar to the hot water. You don’t need to be exact; an estimate will do.
  3. Be generous with the salt. Add about half a cup of salt to the water-vinegar mixture. Salt helps harden the broom’s bristles, increasing its longevity.
  4. Submerge the broom in the water, ensuring that the bristles are completely covered. Let it soak for at least 30 minutes. You can also leave it overnight for better results.
  5. After the soaking time, shake the broom to remove any loose dirt and debris.
  6. Allow the broom to air dry. To speed up the drying process, you can place it in a way that any moisture can flow down to the tips of the bristles. For example, you can hang it upside down in your shower.
  7. Once the broom is dry, it should be revived and last longer, thanks to the vinegar and salt treatment.

Read More