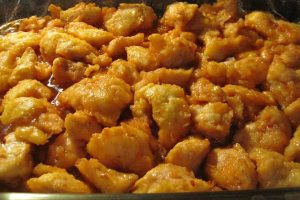
The first two times I followed this recipe, the chicken tasted a little too greasy for us. I decided to give it one last try and substituted 1/2 cup butter for the oil. I also add a little milk to the beaten egg. It turned out delicious this time. We’ll definitely make it again!
My family loves this recipe. I make it with chicken drumsticks instead of thighs and the only change I make is spraying the pan with Pam instead of oil. We’ve tried this recipe several times and they are ALWAYS cooked in the allowted time and are ALWAYS moist and yummy. We even fight over the leftovers.
Easy, no-fuss fried chicken. The first batch I made was delicious and the family raved about it. I used baggies for the breading for easy cleanup. I also let the breading “rest” for fifteen minutes before putting the chicken in the oven, so the coating stayed on well and turned out nice and crisp. Will definitely make this again!
 This recipe was really easy, and very good considering it was baked. I had too much chicken to put in one pan so I decided to do a little test and pan fry the rest of it the traditional way. The oven fried was better overall; it required less “work” because you only had to flip it once and didn’t have to “watch” it and oil didn’t pop out and burn me (as usual). I think the key to keeping the coating on is making sure you pat dry the chicken first, coat well with the flour, shaking off the excess, quickly drudging it though the egg, which I added about 4 tablespoons of standard hot sauce to my egg mixture just to give it a little kick, and then really roll it around in the bread crumbs to get a nice even coat. I added lemmon pepper seasoning after the chicken was in the pan right before it went into the oven and it really was delish. Will do this again for sure!
A nice recipe for “Fried” Chicken, it was crisp, delecious, great flavor, and the only thing I changed was using Pam instead of the half cup of olive oil. You don’t need a lot of it, just a light spray. Will definitely be making this again.
I find this easy – use a large freezer bag for the flour (and salt and pepper), shake and remove the floured chicken and re-use same bag for the bread crumb coating (why use two bags?). I also left the coated chicken in the fridge for a while before placing into the glass roasting pan with the oil already heated. The finished coating is similar in texture to original recipe KFC, which is to my liking (chewy-crispy) but can easily be made more crispy by cranking the heat up for the last 5 min or so.
My grandma used to make us boneless chicken breast “patties” to take on vacation– we ate then cold out of the cooler or hot when we got there. It would take her all day to pound, bread and fry this juicy familiar family favorite. I have not had chicken like that since she passed away… that is, until now! This chicken tasted very very similar to hers, with half the work. I used boneless, skinnless chicken thighs (b/c that is what I had), and only about 1/2 cup oil. My only advice is that you don’t overcrowd the pan- maybe that is why some people’s took forever. The chicken has to have space between the pieces for oil and air to move or they will turn soggy. I had my pan too full and realized it in time to separate into two before any problems arose. Overall, great, easy, tasty and not greasy, if you go easy on the oil and blot on towels afterward. Loved it!!! Thanks. Grandma lives on!
Continue reading ingredients & instructions on the next page

 1/2 pound chopped pecans

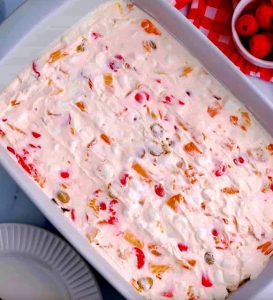 This vintage recipe is straight out my grandmother’s recipe box.It’s a amusing twist on marshmallow fruit salad, but it’s miles even more amusing because of the truth it’s miles frozen!It’s best for events or as a fresh facet dish withinside the summer. Frozen fruit salad can be a light dessert.This recipe is continually a staple on my family’s vacation.My Aunt Jenny normally makes them now and they’re each Easter, Thanksgiving and Christmas.
 Without wheat, and whether you are “gluten-free” or not, it will always be beneficial to have less wheat in your dishes, less starch than traditional pasta, low glycemic index, and plenty of vegetable protein (twice as compared to classic pasta).
 1/2 cup all-purpose flour
 Preheat Oven to 250 degrees F ,baking sheets on line 2 with parchment paper; Sit apart .

 3/4 cup sugar
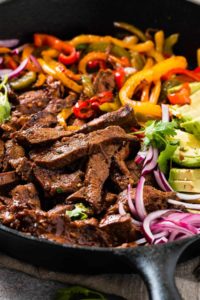
 2 avocado, NS as to Florida or Californias avocados – peeled, pitted and diced