Step 2: Protect and Prep the Room
Understand that removing a popcorn ceiling is a messy affair. Nonetheless, proper preparation can significantly reduce the post-project cleanup. Start by removing all the furniture and cover the room’s floor and the lower portion of the walls (approximately 16 inches up) with heavy-duty plastic sheeting, securing it with masking tape.
Don’t forget to protect the upper walls as well. Tape around the room’s perimeter, slightly below the ceiling, and secure it with additional tape. You may need to remove any ceiling fixtures such as fans, molding, or hanging lights to ensure a smoother process.
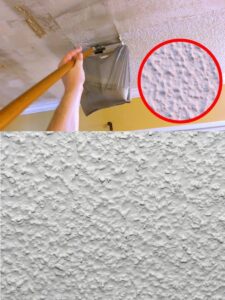
Step 3: Spray, Wait, Scrape
Break the ceiling down into manageable 4-foot-square sections. Using a garden sprayer, drench the first section thoroughly and let it soak for about 10-15 minutes. Don your safety gear – a dust mask and glasses – then get up on a ladder to reach the dampened area. Holding the putty knife at a 30° angle to the ceiling, start scraping off the popcorn texture. Keep this cycle of spray, wait, and scrape, working one section at a time until you’ve covered the whole room.
Step 4: Prime, Paint, and Finish Up
Continue reading on the next page